Installing rubix-plugin-email
How-to Guide
Author:
Fluent Commerce
Changed on:
12 Feb 2024
Key Points
- Upon following the guide, you would be able to set up a "send email” button for specific order statuses, which will be plugged to the email service
Steps
 Set up a mailing template on Mandrill
Go to mandrill and setup a mailing template. Ensure the template name is unique. For Example: RANDY_HD_FLUENT_NOTIFICATION: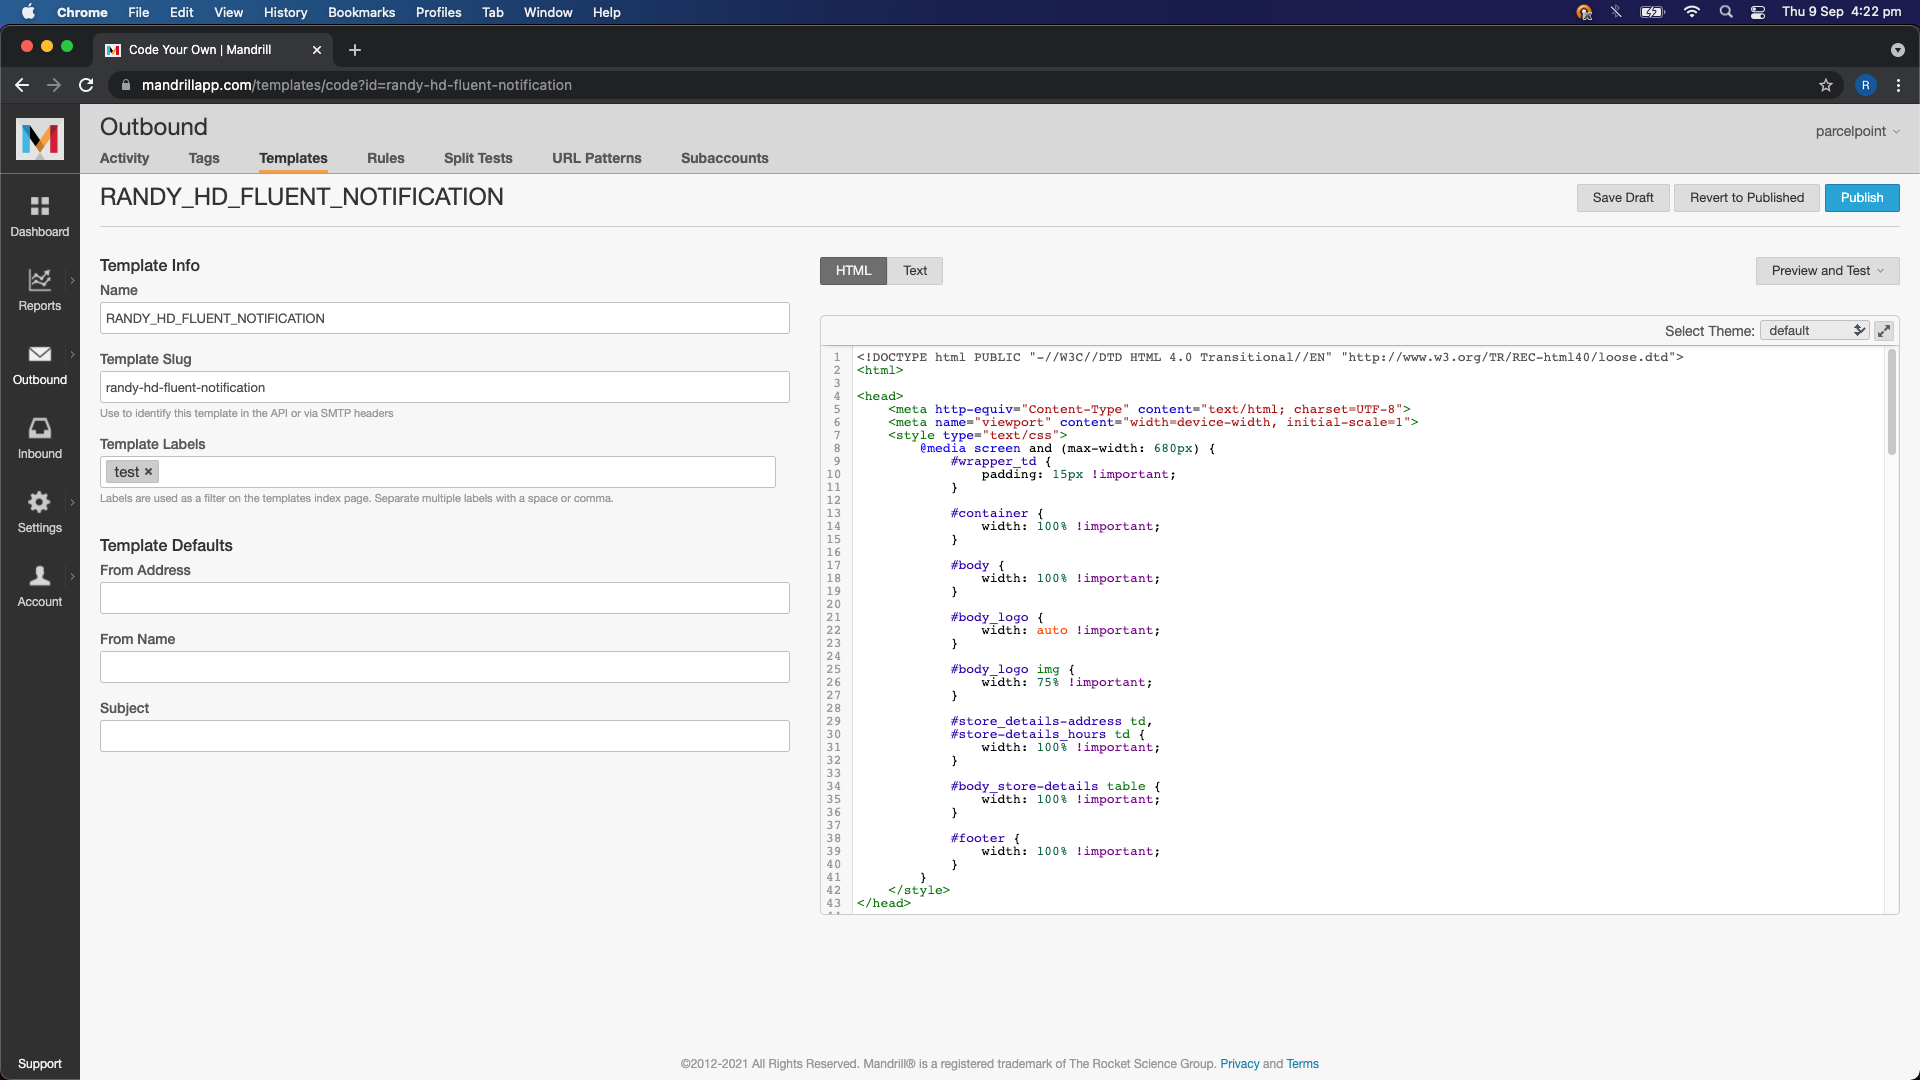
Unzip the file
Get the rubix-plugin-email zip file from our ES team. unzip the file in your local computer. The unzipped folder should contains pom.xml file and src folder.
View the content on IntelliJ
Open IntelliJ (ensure the right Java and Maven versions have been setup), in the IntelliJ, open the unzipped folder (in my example, my folder name is “rubix-plpugin-email 2”). Then double click on pom.xml file to view the content: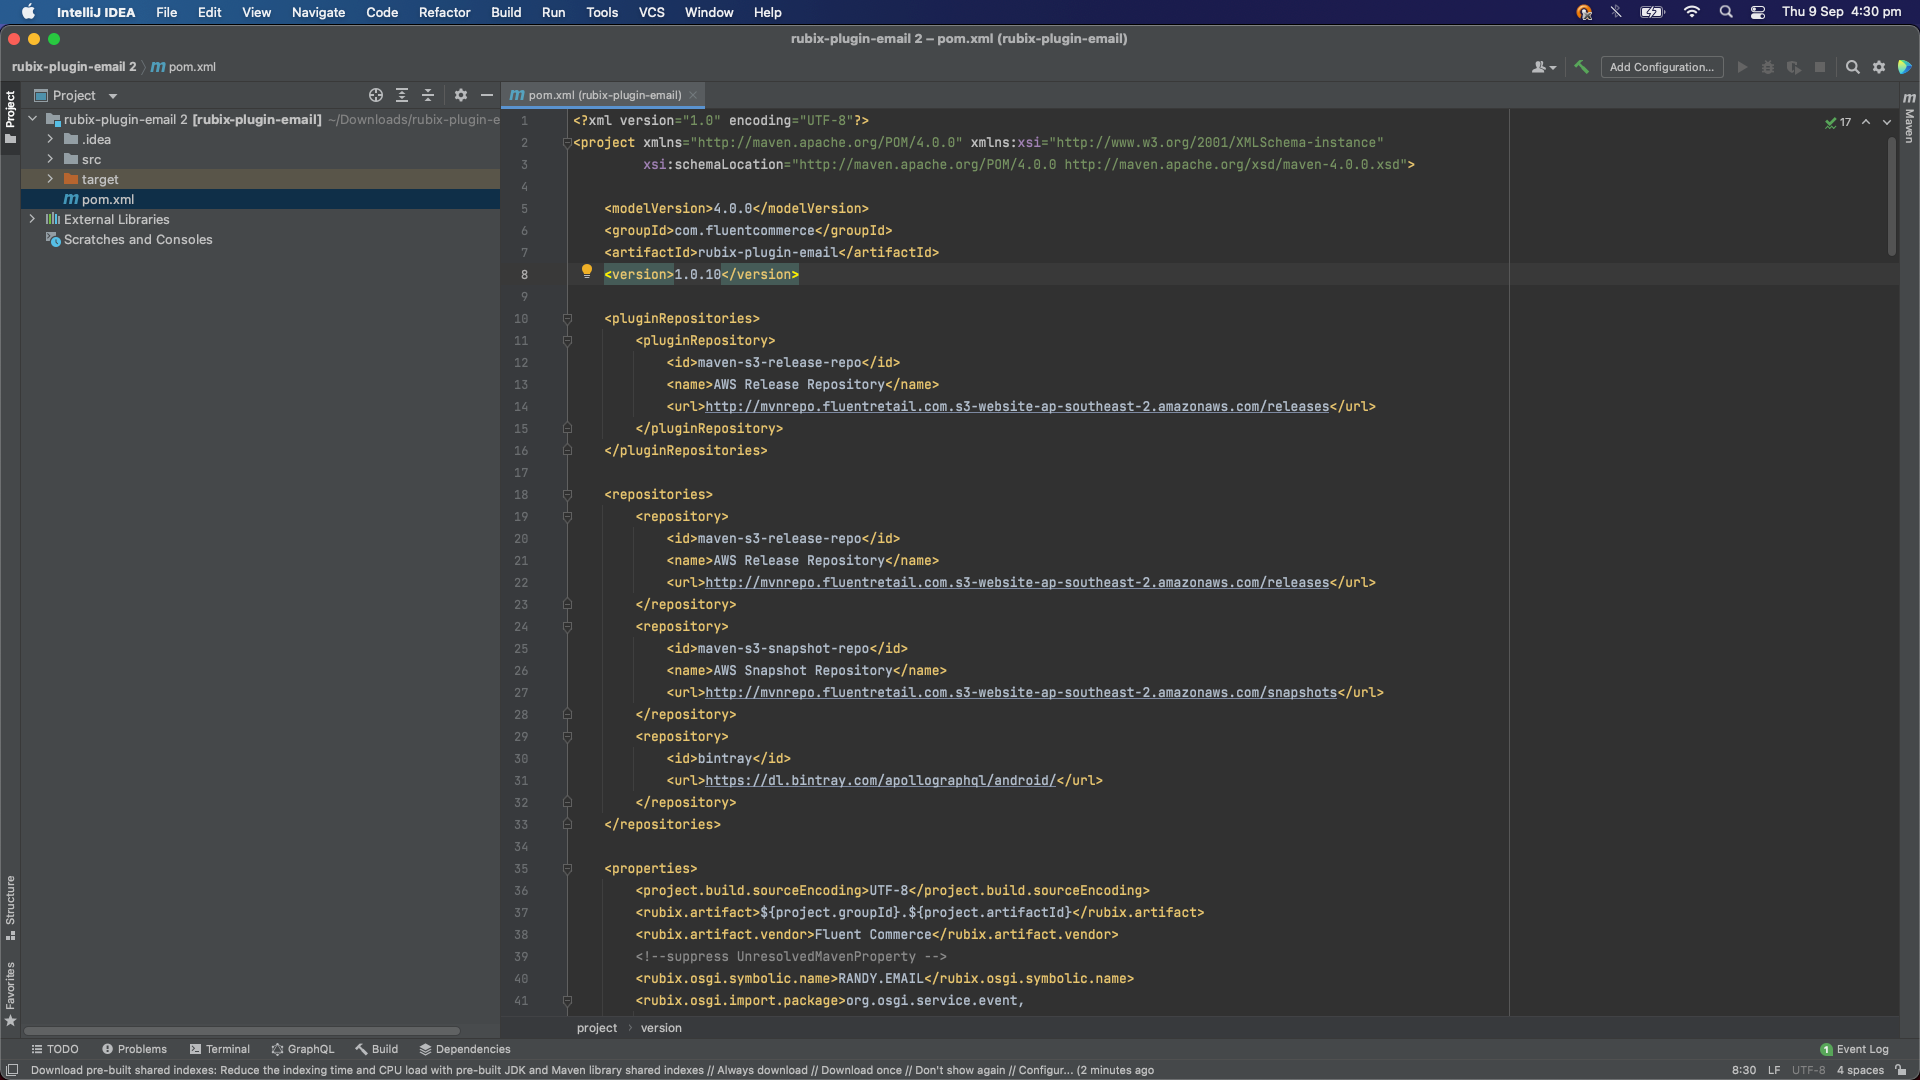
Modify pom.xl
Change the following in the pom.xml:
- Set the version number (number that you would like to prefer) in line8 to:
`<version>1.0.10</version>` - Set the symbolic name: in line 40 with your sandbox Account ID and package name you want to call. (in my example, the name is EMAIL):
`<rubix.osgi.symbolic.name>RANDY.EMAIL</rubix.osgi.symbolic.name>`
Build the package
Open Maven within the IntelliJ, go to rubix-plugin-email->Lifecycle and select “clean” and “package” (Cmd+Click). then click on the run (green arrow) button to build the package: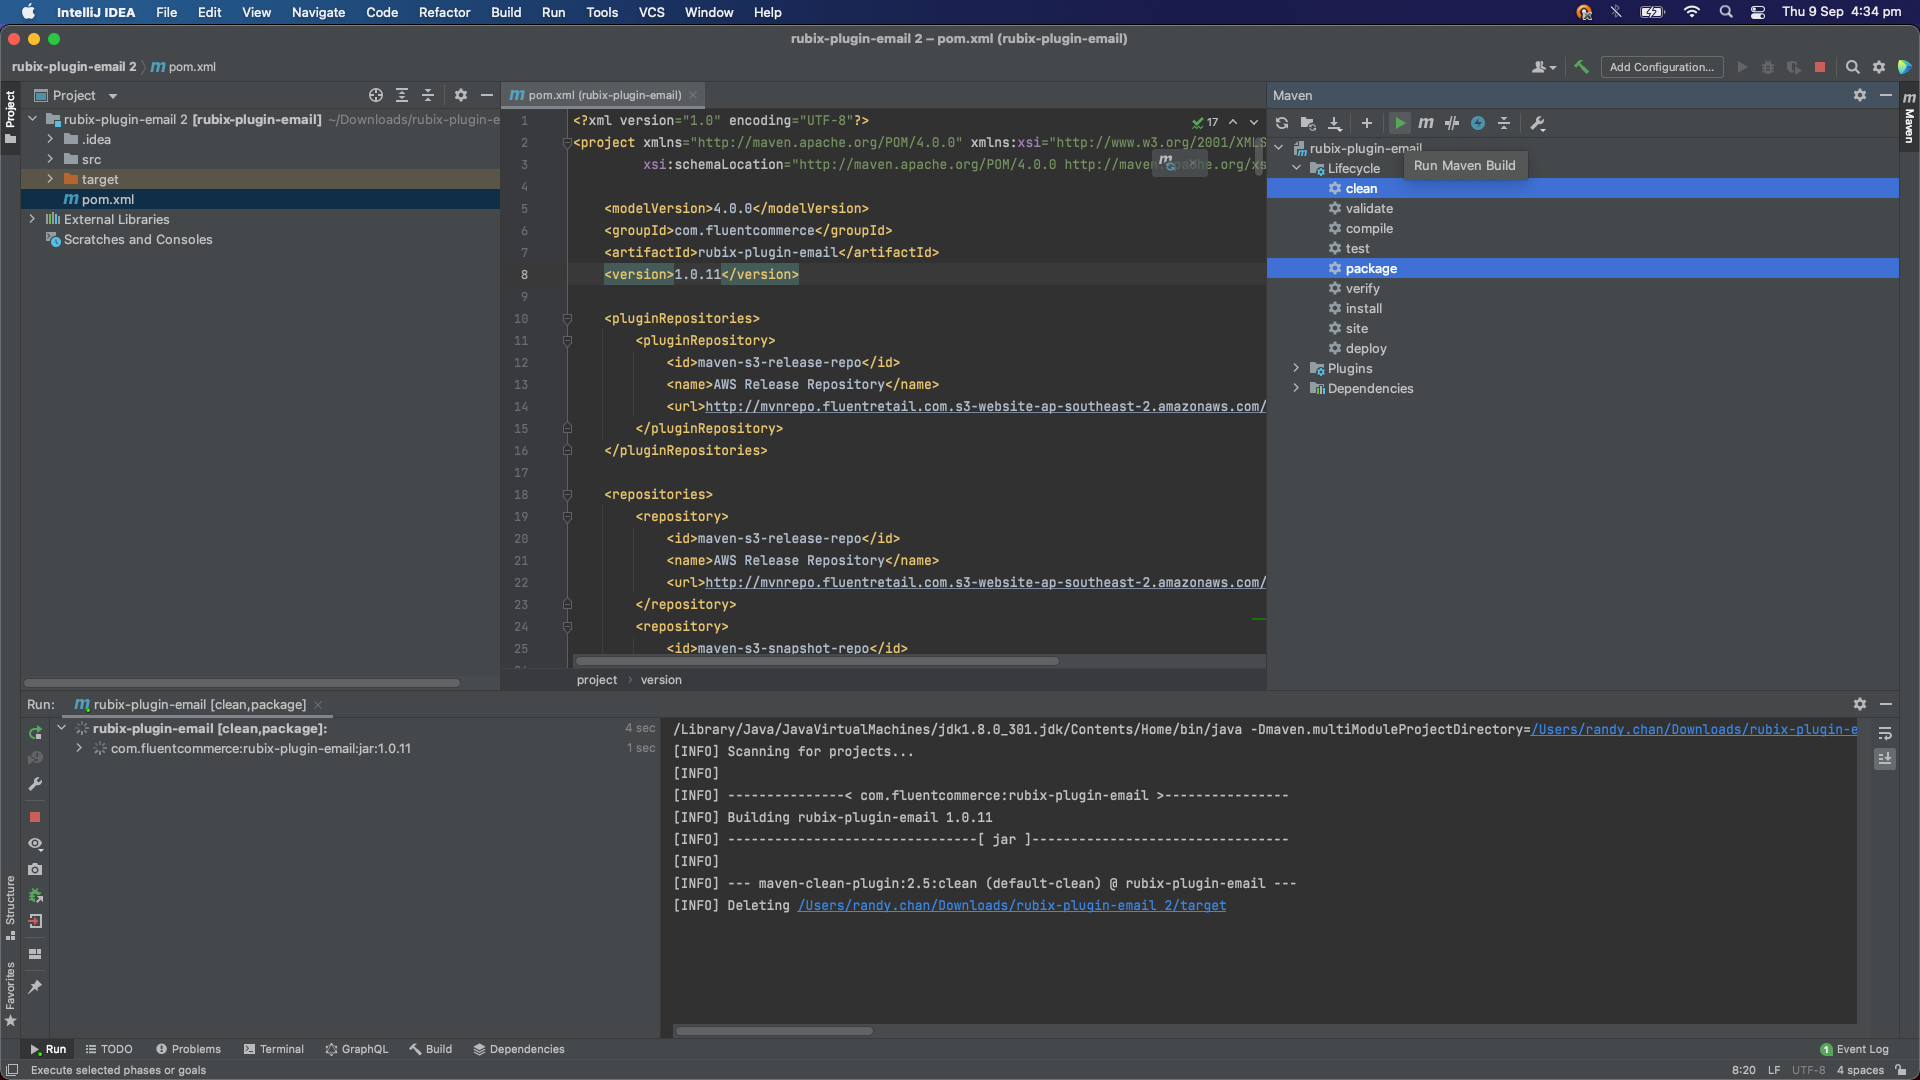 The result window should display “BUILD SUCCESS” message:
The result window should display “BUILD SUCCESS” message:Verify that “target” folder is created
Go to the unzipped folder, a new folder “target” is created from the previous step. The target folder contains the jar file that we can upload into rubix in next step.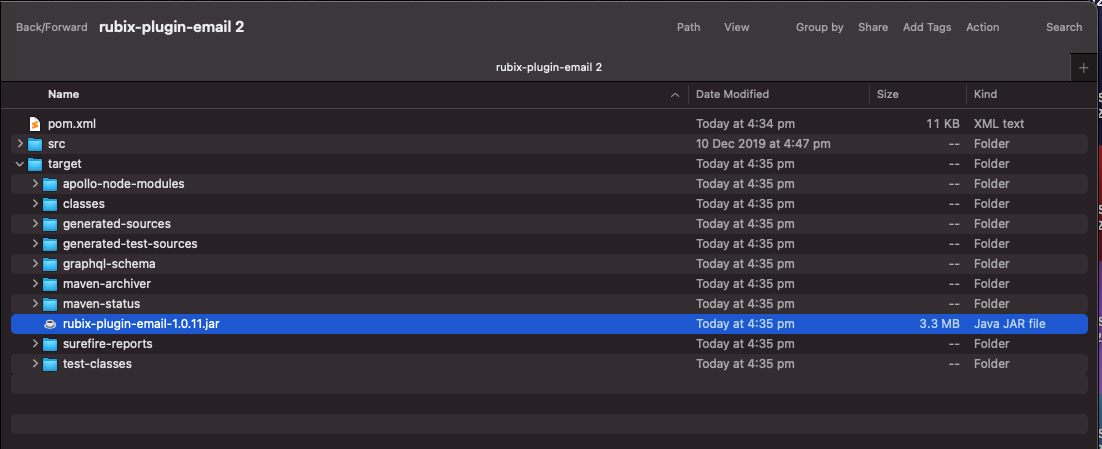
Run OAuth
Now go to Postman, run Account OAUTH and go to “plugin - Upload” request. In the Body tab, A “Select Files” button is located under value section. 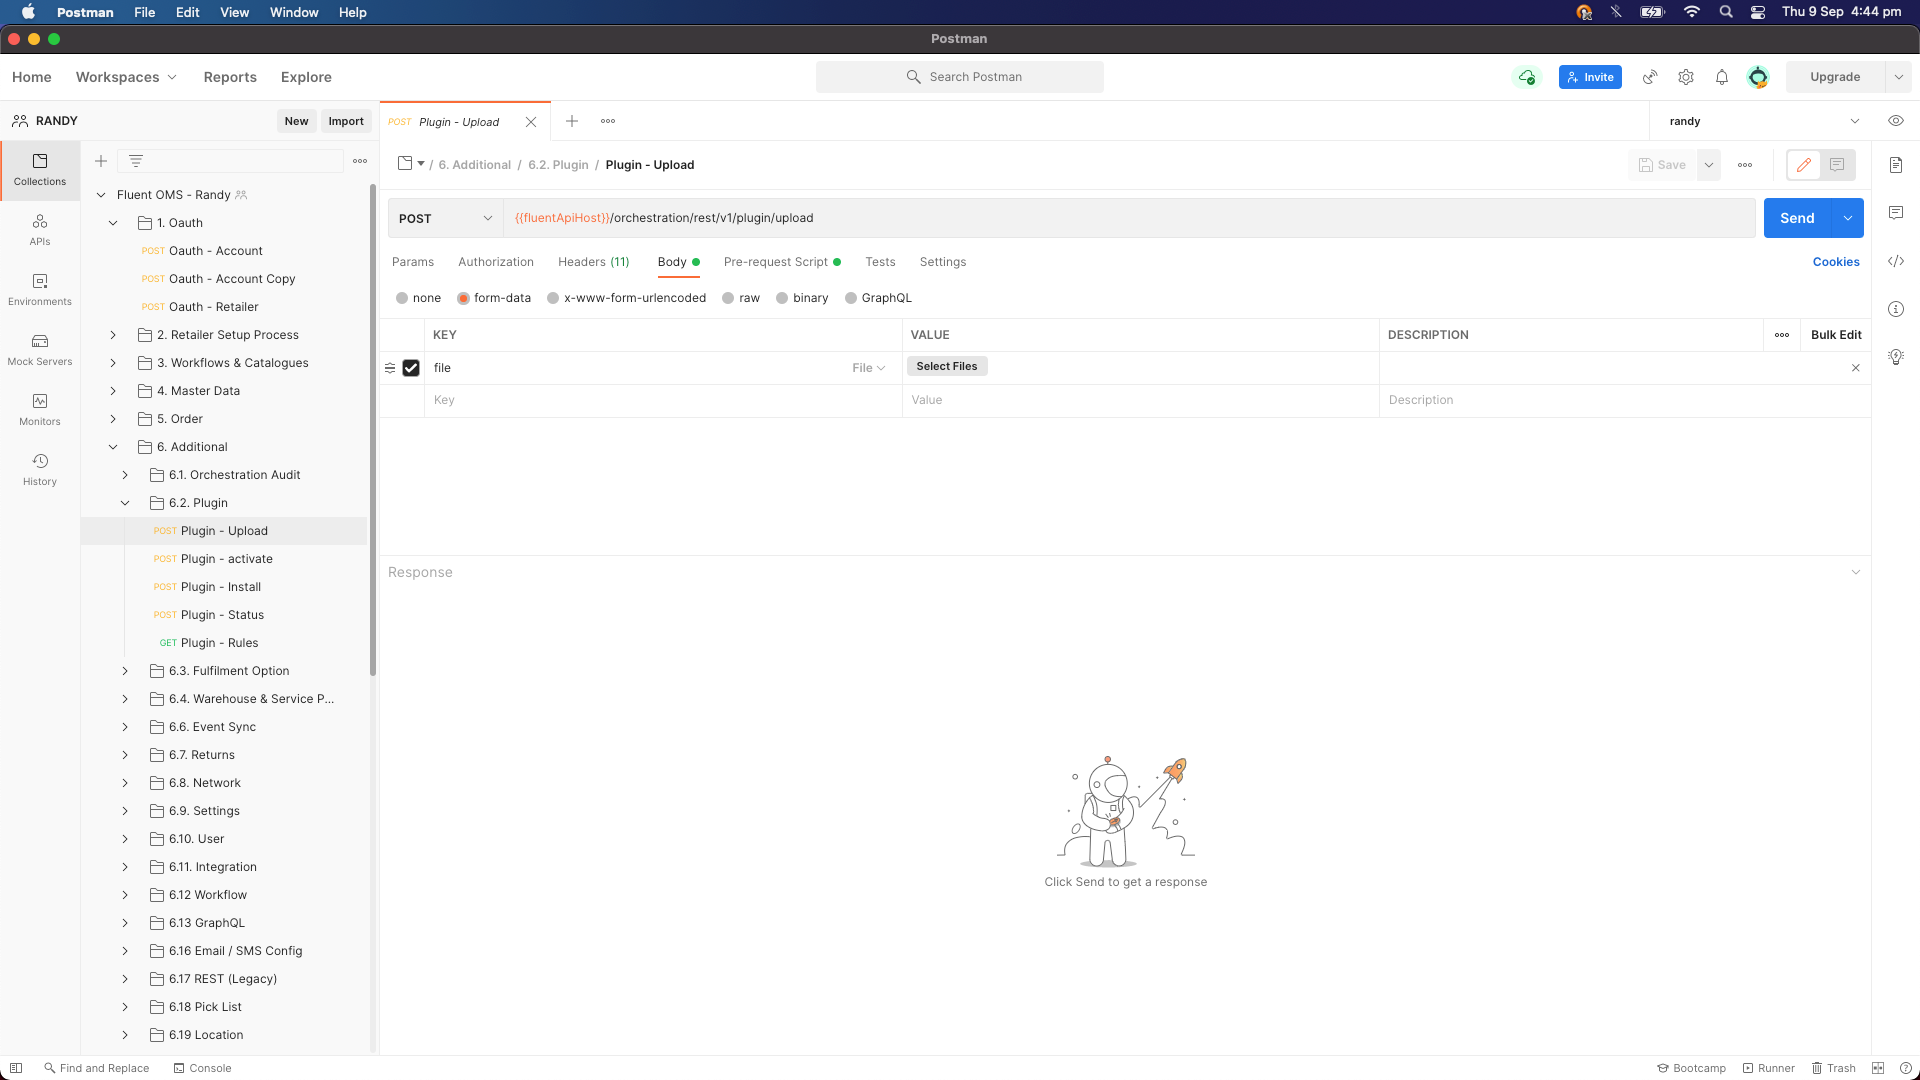
Open the jar file
Click on the button, go to target folder path and select the jar file, then click on Open button.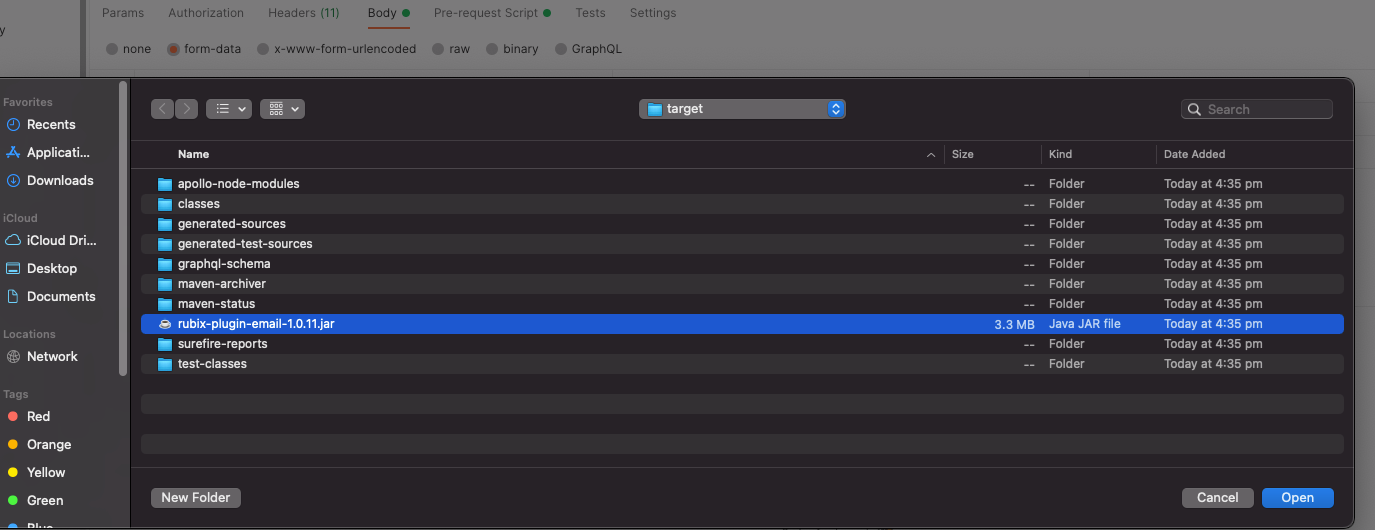
Click send
Back in the Request page, click on “Send” button on the right and you should get the status 200 OK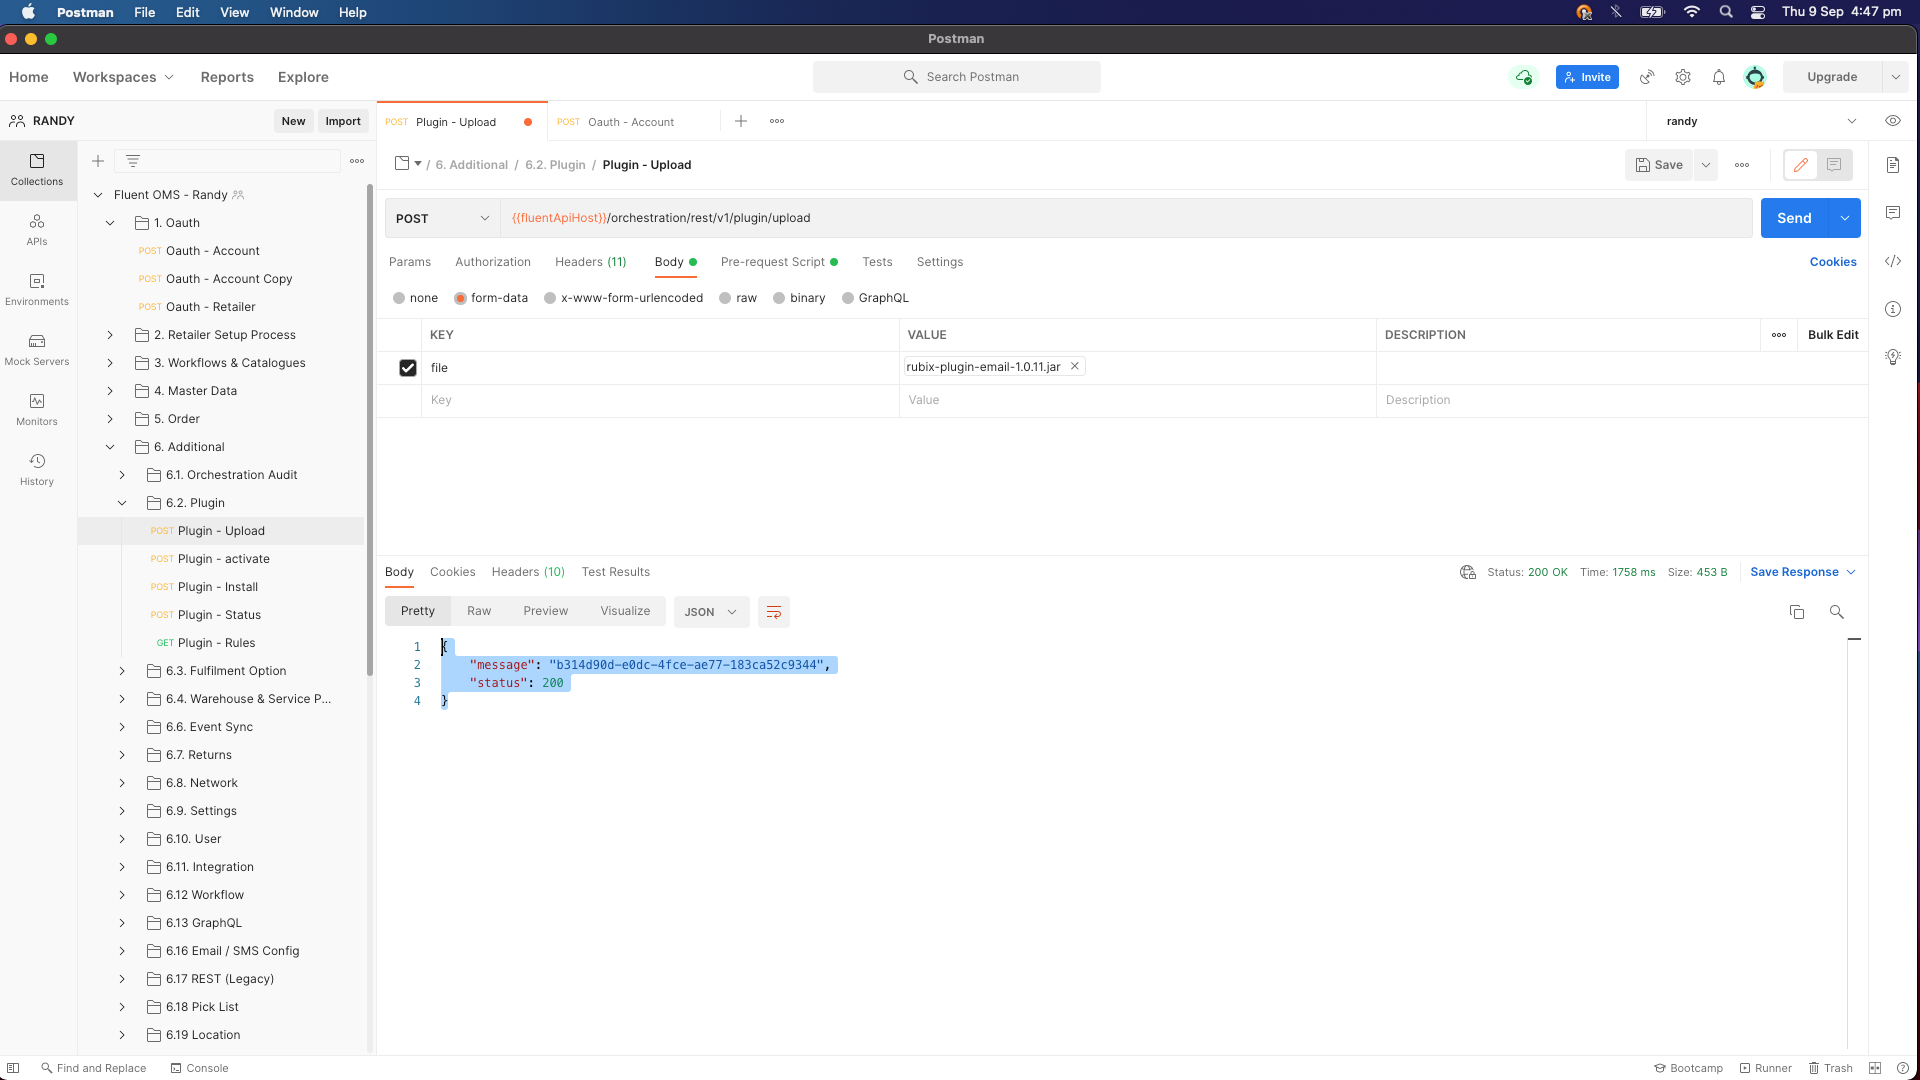
Modify the request
Then open “Plugin - Install (or activate)” request: {{fluentApiHost}}/orchestration/rest/v1/plugin/installChange the body to the following:Where accountId = your sandbox account IDBundleName: <the symbolic name>::<version number>Symbolic name and version number can be found in your pom.xml file. (From Step4). Click on “Send” button and should get status 200 OK with blank response: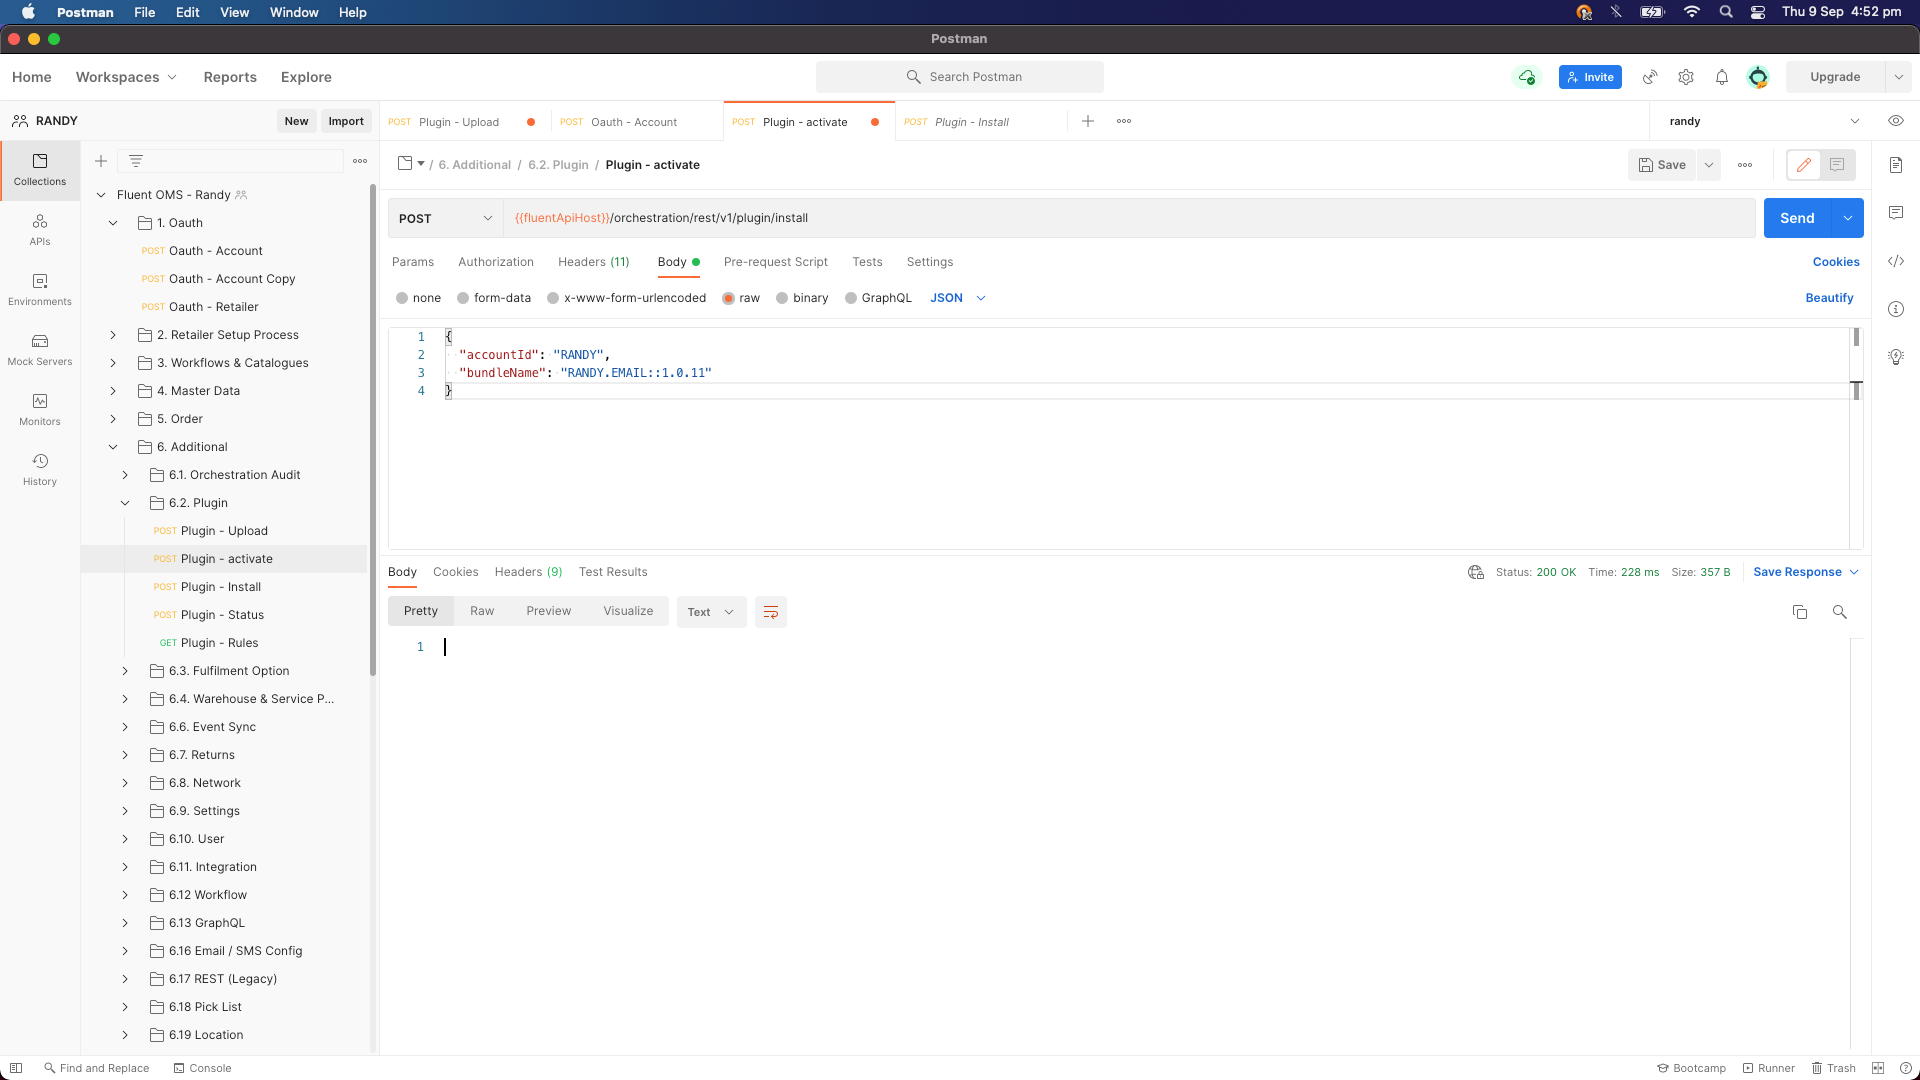
Check that the new rule is installed
go to “Plugin - Rule” GET: {{fluentApiHost}}/orchestration/rest/v1/plugin to check if the new rule is installed into your sandbox: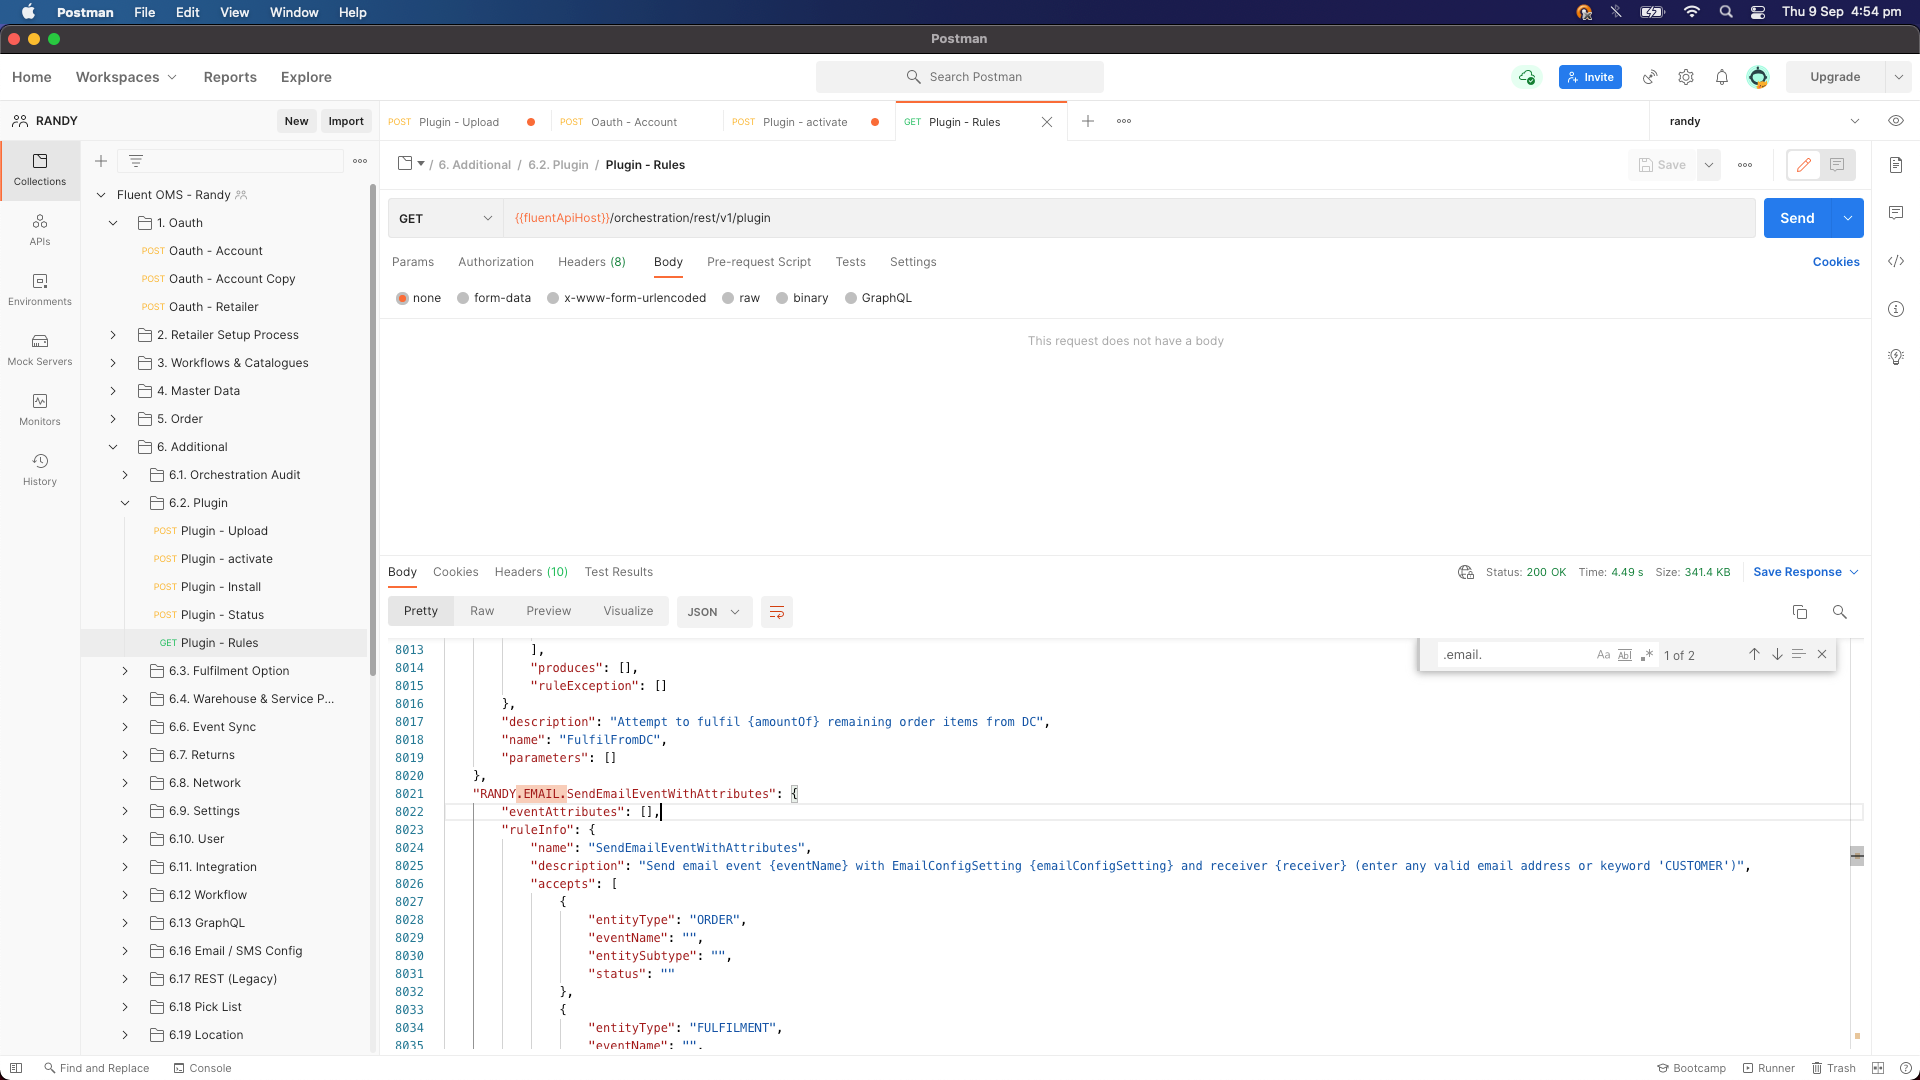
Configure EMAIL.SERVICE.CONFIG
Go to the Admin Console -> Settings and configure EMAIL.SERVICE.CONFIG (refer to: Sending Emails )
Add the code to the Workflow
Go to the HD order workflow, add the following code into your workflow. the code will add a user action button for “BOOKED” order. when the button is clicked, it will be calling RANDY.EMAIL.SendEmail* rules that installed from the above. Ensure that the value in line 13 is aligned with line 3 in Settings.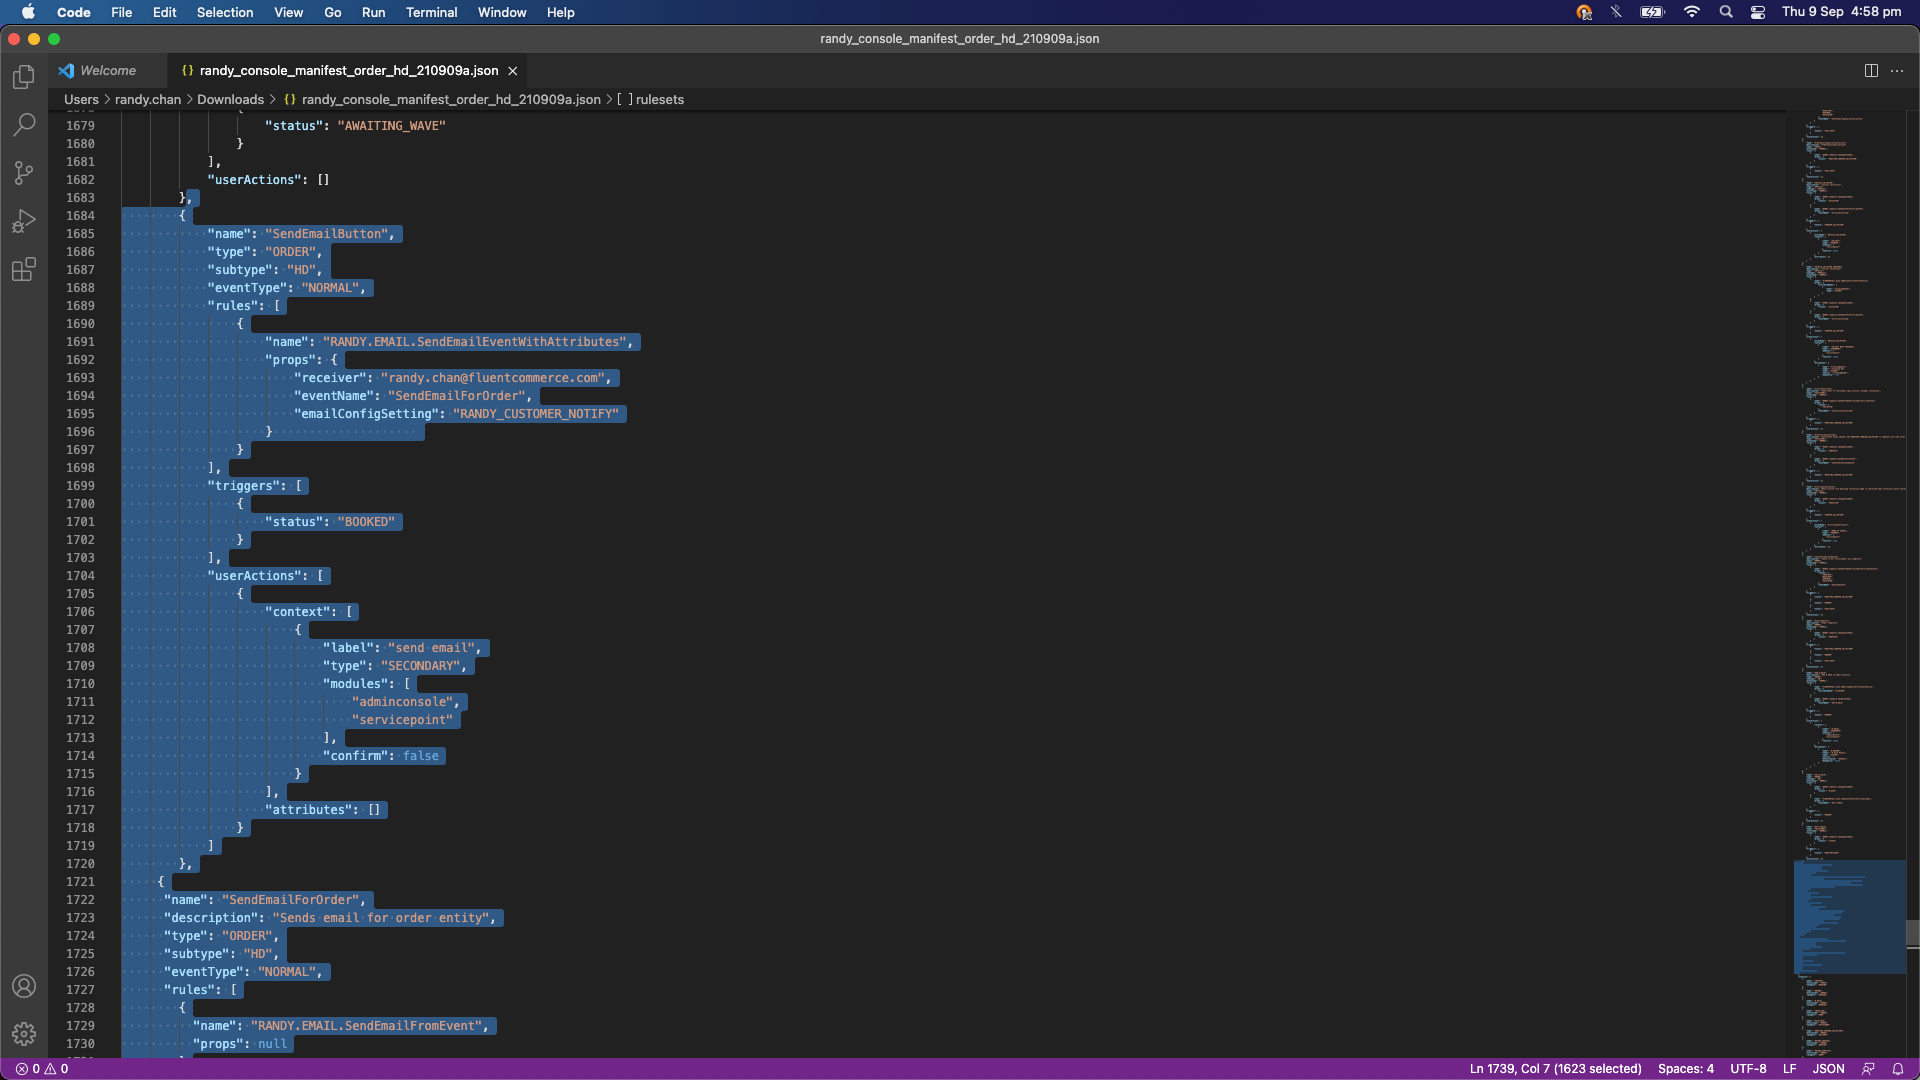
Check your inbox:
check your inbox:
Load an order in Booked status
Load in a HD order into BOOKED status, go to the Order detail page and click on “SEND EMAILS” button. A Successfully message should be displayed.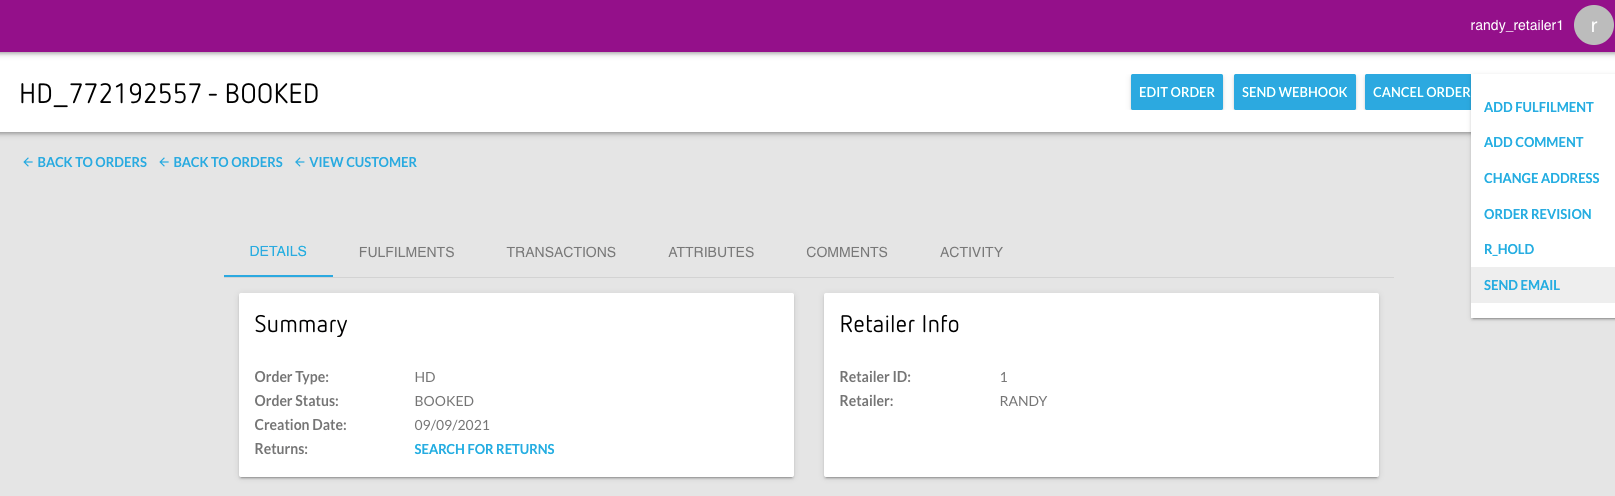

Sample of the Mandrill template
Sample Mandrill template