Workflow Framework
How-to Guide
Changed on:
5 Nov 2024
Key Points
[Warning: empty required content area]Steps
Module 1. Overview & Recap
 Overview of Workflow Framework
This course combines both theory and practice. You'll acquire new knowledge of the Workflow Framework, its fundamental concepts and terminologies, and also learn about best practice workflow design concepts. After covering the theory, you will get ‘hands-on’ by completing a lab exercise where you'll have a go at composing business logic (code free) via the Workflow Builder. The Workflow Framework provides the following value propositions:
Module Breakdown
Module 1. Workflow Framework — Overview and recap of key concepts
Review of key concepts covered in the Foundation e-course.Module 2. Workflow Builder
Key features of the Workflow Builder and how it's used to build unique business logic within workflows.Module 3. Workflow Patterns and Practices
Guidelines for designing rules and composing workflows, and review of workflow design patterns and practices with the help of a case scenario.Module 4. Event Execution
Details into the inner functioning of workflows, and how incoming events are handled by the Workflow Framework.Lab
Your first experience in composing unique business logic in the Workflow Builder to solve a simple order management use case.Order Management Experience (OMX)
A diagram of the main layers of Fluent Order Management is shown below, specifically:- Web Apps
- Modules
- Order Management Experience
- Workflow Engine (also known as Orchestration Engine, code name Rubix)
The Workflow Framework provides the following value propositions:- Flexible Customisation – Composing logic in the workflow (rather than code), allows clients and partners more control over their business processes and reduces expensive and time-consuming change requests.
- High performance and scalable processing – Cloud technology provides on-demand scale, enables simultaneous processing of events and ensures the platform is processing as optimally and as efficiently as possible.
- Low-Code Configuration –Allows users to view and configure without having to open any Java development environment. Non-technical users can simply search, find and insert a Rule into a workflow. Low code configuration also allows users to rapidly test and make changes to workflows without having to go through weeks or months of development cycles and testing cycles.
- User Interaction – Enables smart integration of user-specific activities within workflow logic. This is because there are specific cases where an order process simply can't be automated 100%, and needs manual intervention.
Key components of the Workflow Framework
Workflow Builder is also referred to as Workflow Modeller or Orchestration Modellerin other resources such as Lingo documentation and within other courses. It is the user interface (UI) of the Workflow Engine and provides visualisation and management of all configured workflows, including rule sets, rules, and user actions.👁🗨 You will learn about the key features of the Workflow Builder UI later in Module 2.Rule library allows users to search for ‘out-of-the-box' rules within the workflow. 👁🗨 It's also possible to create custom Rules using Software Development Kits (SDKs), which can be added to the Rule Library — custom rule development is covered in the Rules SDK course. Workflow Engine powers the execution of workflows, business logic, and business processes. It responds to events triggering execution and triggers activities in external systems.👁🗨 You will learn more about the Workflow Engine and related concepts later in the course in Module 2.Rules SDK is a Software Development Kit that allows developers to write custom Rules in Java, which can be compiled into a plugin and uploaded for use in the Rule Library. 👁🗨 This course mainly focuses on the 'configuration' capabilities of OMX — Rules customisation is covered in the Rules SDK course. When designing workflows, there are a number of patterns and recommended practices that can be applied. Rules are the smallest building blocks for logic in a Workflow and should be simple, flexible, reusable and composable.👁🗨 This course provides information on design patterns as well as recommended practices that can be followed while designing your Workflows.Let's Recap
In this lesson, we'll revise some fundamental concepts and terminologies.
Rule: A Rule represents a single building block for logic and has a single purpose. Rules may produce a single Action, such as changing the state of an entity or sending a new Event.Example of rules:
Ruleset: A Ruleset is a collection of one or more Rules which are combined to form a single task within a process. Example of ruleset:Imagine a task in the process to annotate an Order with some flags before continuing processing. We could define a Ruleset that contains a rule to add an attribute to the order if the order value is greater than a configured threshold. We could also add rules to flag if the order is from a new customer or from a VIP customer. This Ruleset might contain the following rules:
Trigger: A Trigger is the exact criteria for which a specific Ruleset within a Workflow will be executed upon a given Event. A Ruleset is triggered when an Event is received that contains the exact matching criteria for that Ruleset. Rulesets can be triggered via events received either internally (another Ruleset or workflow), externally (another system), or via user-generated actions from a UI.Example of a trigger:Triggers help ensure that specific Rulesets are only executed when valid to do so. For example:
Status: A Status represents a specific condition and state of the entity at any given time within the lifecycle. In other words, it represents the point at which the entity is within the workflow's business logic.Statuses are configurable, other than the first state of CREATED.Examples of statuses:
Action: An Action represents an outcome of a Rule.Examples of actions:Some common examples of Actions include:
User Action: A User Action is a UI interaction such as a button and labels. It can be integrated with workflows on Fluent Web apps. Examples of user actions:
 On the left are single lego blocks, which represent a Rule. Rules are the smallest building block for a task (ruleset) in a process. Combining single Rules in different sequences makes a Ruleset, represented by the lego blocks on the right.Single lego blocks are not very useful on their own, but when combined in different sequences, they form Rulesets that execute different pieces of logic — this logic could be for example to perform a specific task within a business process.Let's say we've defined the following Rules:
 All Events enter the OMX Workflow Framework via the Fluent APIs. The framework processes these Events via the Event Queue matching the correct workflow and Rulesets to execute — this all occurs within the Workflow Engine.
 Outbound (Actions) from the Workflows retrieved from the Rules are returned back and applied via the Fluent APIsThe Action can:
 Workflow phases and statesEach workflow has phases (Status or Categories) that the entity flows through from beginning to completion. A default Order workflow for example involves 4 phases:Booking, Fulfillment, Delivery, and Done/Complete.Each of these phases can contain one or many statuses:
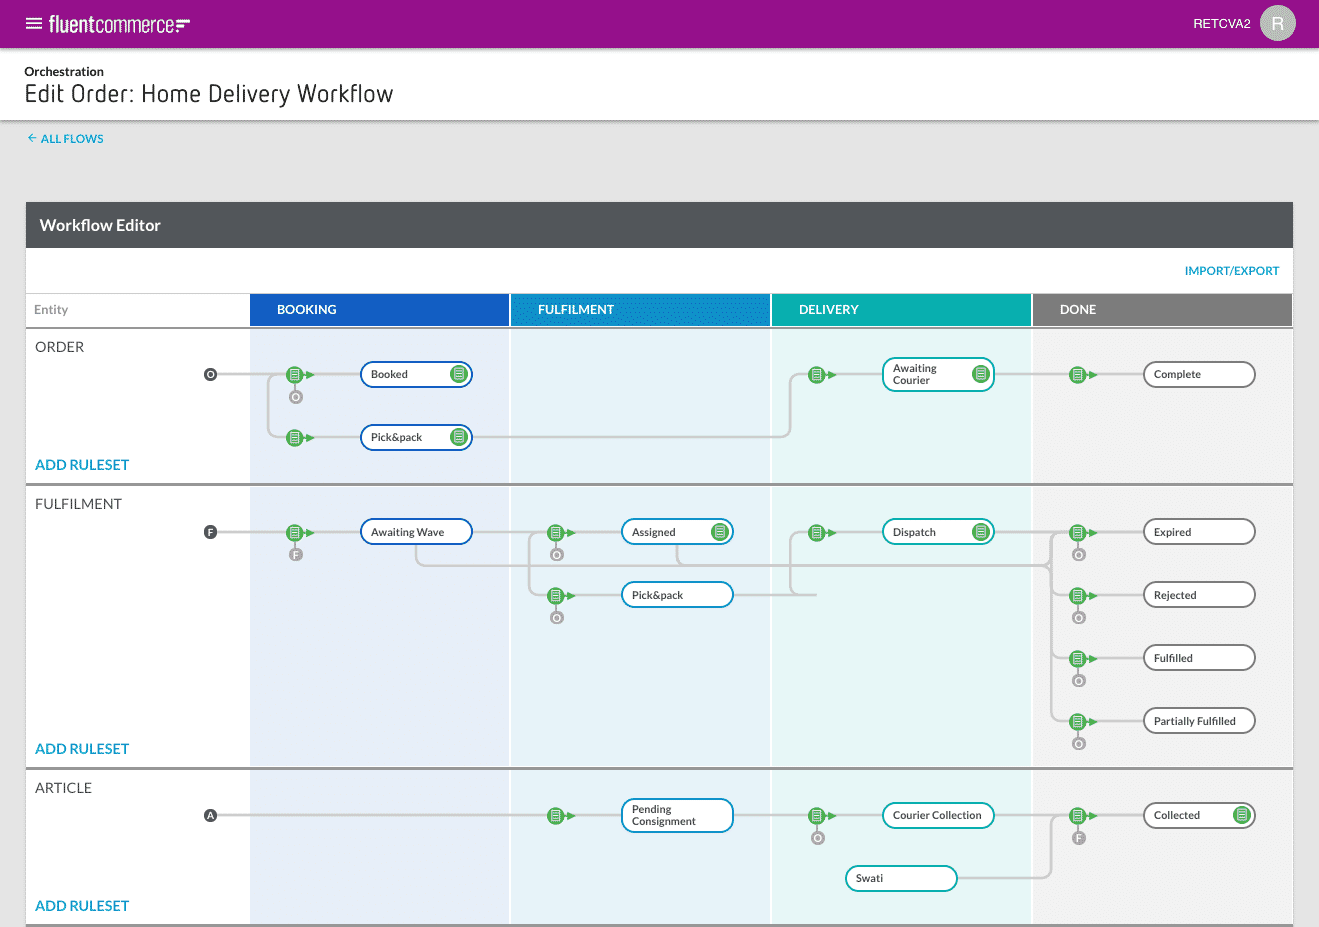
Review of key concepts related to Workflow Framework
Event: An Event represents something that has, will, or is happening within the platform. It is typically used to trigger the platform to do something (ORCHESTRATION Event) or log activity (ORCHESTRATION_AUDIT Event).Example of use cases for events:- A client system might send an Event to cancel an in-progress order.
- When an entity's state changes, such as the Order moves from Created to Booked, an Event is written indicating that this happened.
- An order is set to expire after a configurable period of time to ensure that it gets re-routed to another location to be fulfilled.
Rule: A Rule represents a single building block for logic and has a single purpose. Rules may produce a single Action, such as changing the state of an entity or sending a new Event.Example of rules:
- Change the state of an entity
- Send an email
- Notify a Warehouse Management System (WMS) of a fulfilment request.
- Send a new Event
- Updating data on an Entity.
Ruleset: A Ruleset is a collection of one or more Rules which are combined to form a single task within a process. Example of ruleset:Imagine a task in the process to annotate an Order with some flags before continuing processing. We could define a Ruleset that contains a rule to add an attribute to the order if the order value is greater than a configured threshold. We could also add rules to flag if the order is from a new customer or from a VIP customer. This Ruleset might contain the following rules:
- MarkOrderHighValue (Threshold: $200)
- MarkOrderFromNewCustomer
- MarkOrderFromVIPCustomer
- ForwardTo (EventName: ValidateBooking)
Trigger: A Trigger is the exact criteria for which a specific Ruleset within a Workflow will be executed upon a given Event. A Ruleset is triggered when an Event is received that contains the exact matching criteria for that Ruleset. Rulesets can be triggered via events received either internally (another Ruleset or workflow), externally (another system), or via user-generated actions from a UI.Example of a trigger:Triggers help ensure that specific Rulesets are only executed when valid to do so. For example:
- We have an Order in the system with a reference HD_1234 — it was currently in a status RECEIVED.
- The next Event is for a Ruleset called AnnotateOrder, which has a trigger status of RECEIVED.
Status: A Status represents a specific condition and state of the entity at any given time within the lifecycle. In other words, it represents the point at which the entity is within the workflow's business logic.Statuses are configurable, other than the first state of CREATED.Examples of statuses:
- BOOKED
- PICK_PACK
- SHIPPED
- COMPLETED
- CANCELLED
Action: An Action represents an outcome of a Rule.Examples of actions:Some common examples of Actions include:
- Creating a new Event
- Creating or updating an entity via the API
- Triggering a third-party action (sending an email or making a service call against a client API as an example)
User Action: A User Action is a UI interaction such as a button and labels. It can be integrated with workflows on Fluent Web apps. Examples of user actions:
- Confirm Pick
- Cancel Order
Lego is a useful analogy to help understand the relationship between Rules and Rulesets
On the left are single lego blocks, which represent a Rule. Rules are the smallest building block for a task (ruleset) in a process. Combining single Rules in different sequences makes a Ruleset, represented by the lego blocks on the right.Single lego blocks are not very useful on their own, but when combined in different sequences, they form Rulesets that execute different pieces of logic — this logic could be for example to perform a specific task within a business process.Let's say we've defined the following Rules:- Rule 1. Send an Order fulfilment Event for the Entity, Order.
- Rule 2. Send an email
- Rule 4. Send Event to change Status of order from BOOKED to FULFILLED.
All Events enter the OMX Workflow Framework via the Fluent APIs. The framework processes these Events via the Event Queue matching the correct workflow and Rulesets to execute — this all occurs within the Workflow Engine.Outbound (Actions) from the Workflows retrieved from the Rules are returned back and applied via the Fluent APIsThe Action can:- Trigger an outbound event, or
- Trigger a mutation — a mutation triggers a change or update in data.
Workflow phases and statesEach workflow has phases (Status or Categories) that the entity flows through from beginning to completion. A default Order workflow for example involves 4 phases:Booking, Fulfillment, Delivery, and Done/Complete.Each of these phases can contain one or many statuses:- BOOKING: Booked Awaiting Payment, Check Fraud
- FULFILMENT: Picking, Packing, Fulfilled
- DELIVERY: Awaiting Delivery, Delivered
- DONE: Complete, Cancel
Module 2. Overview & Recap
Working with workflows
Workflows are accessible via the Workflow Builder (Orchestration Modeller) which is the UI of the Workflow Engine. It allows non-technical users to access, view, modify and create workflows and user actions.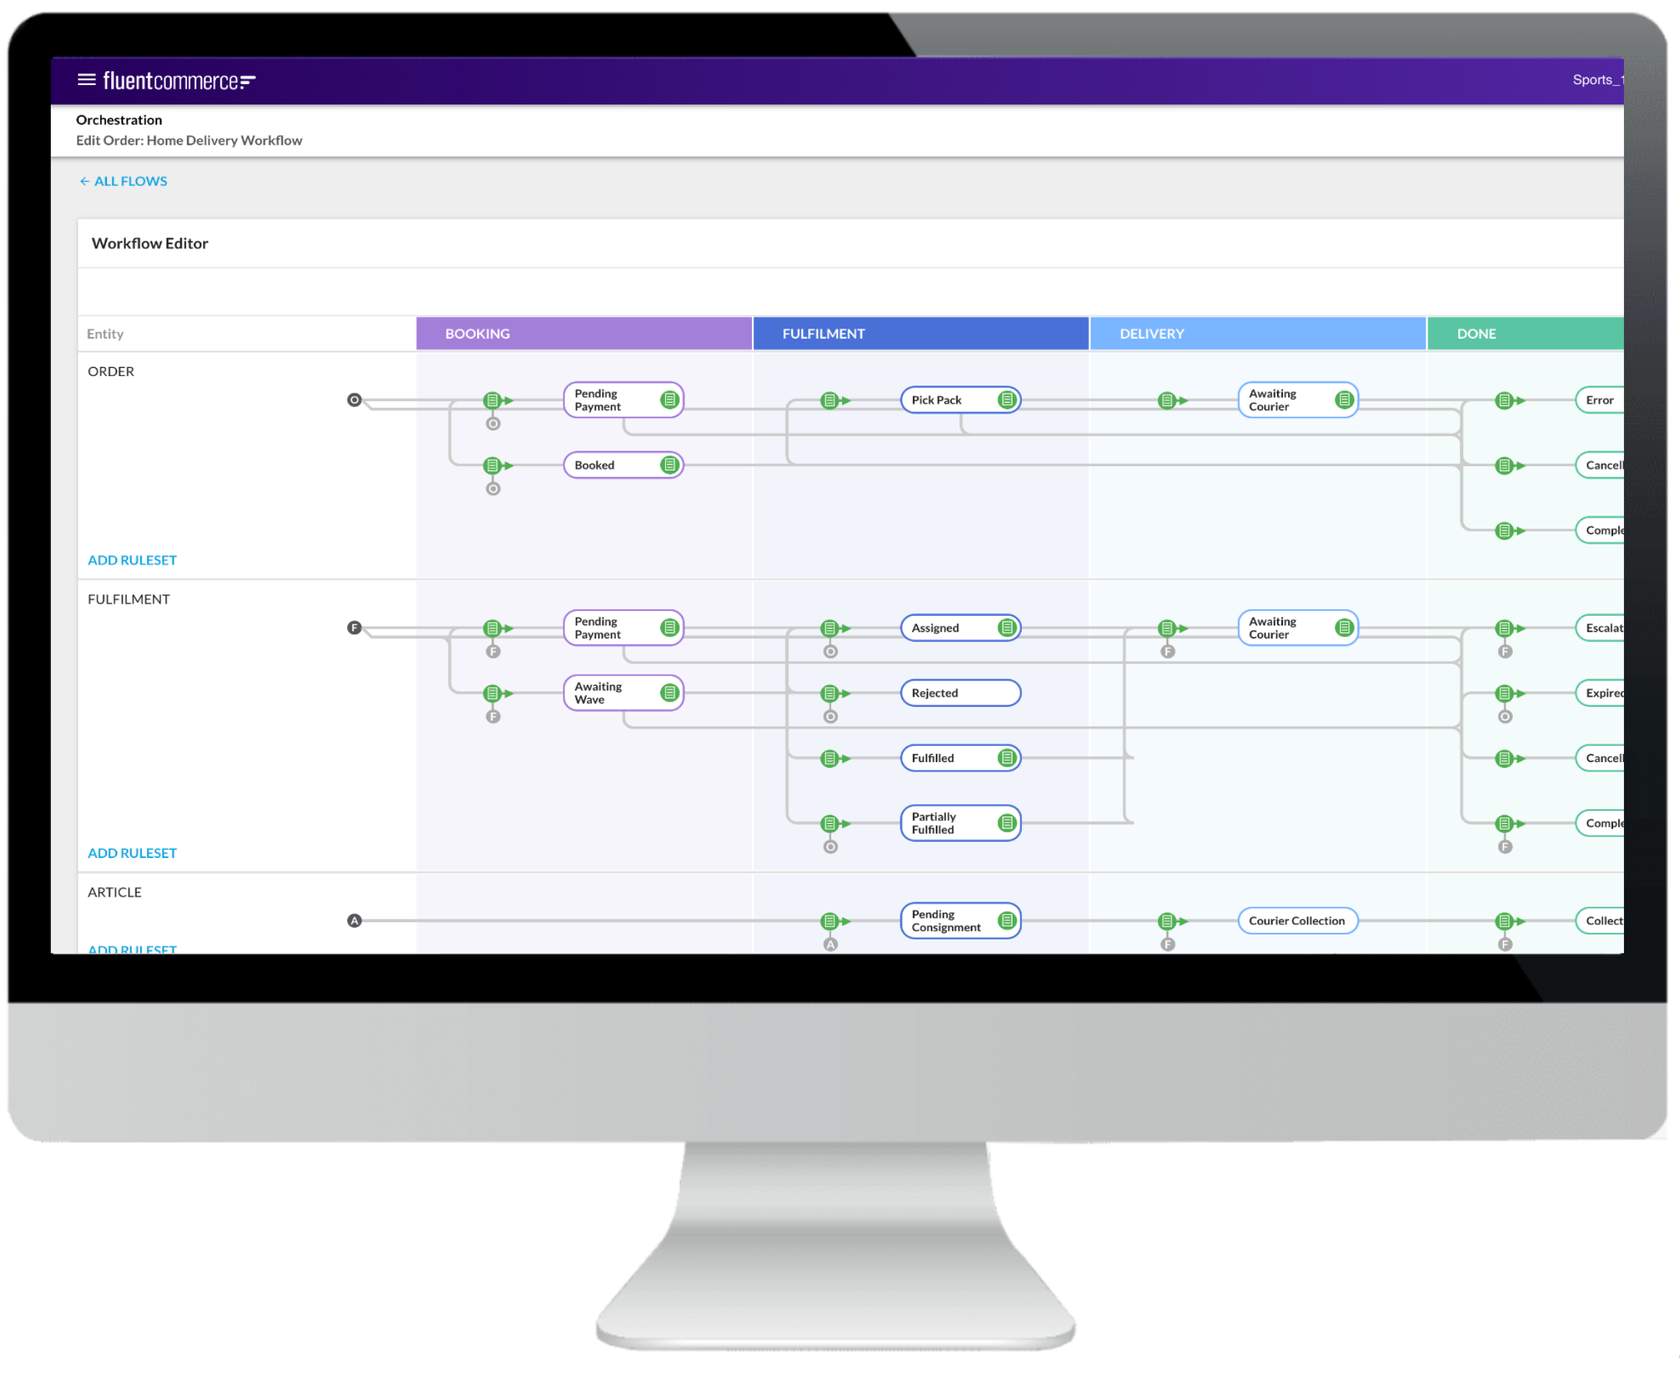
 If you click on a Workflow title (e.g. HOME DELIVERY) a view of the workflow is displayed. If there are sub-entities involved as part of the overall lifecycle of the domain root entity, they are also displayed in the swim lanes (vertical columns) below the main flow.
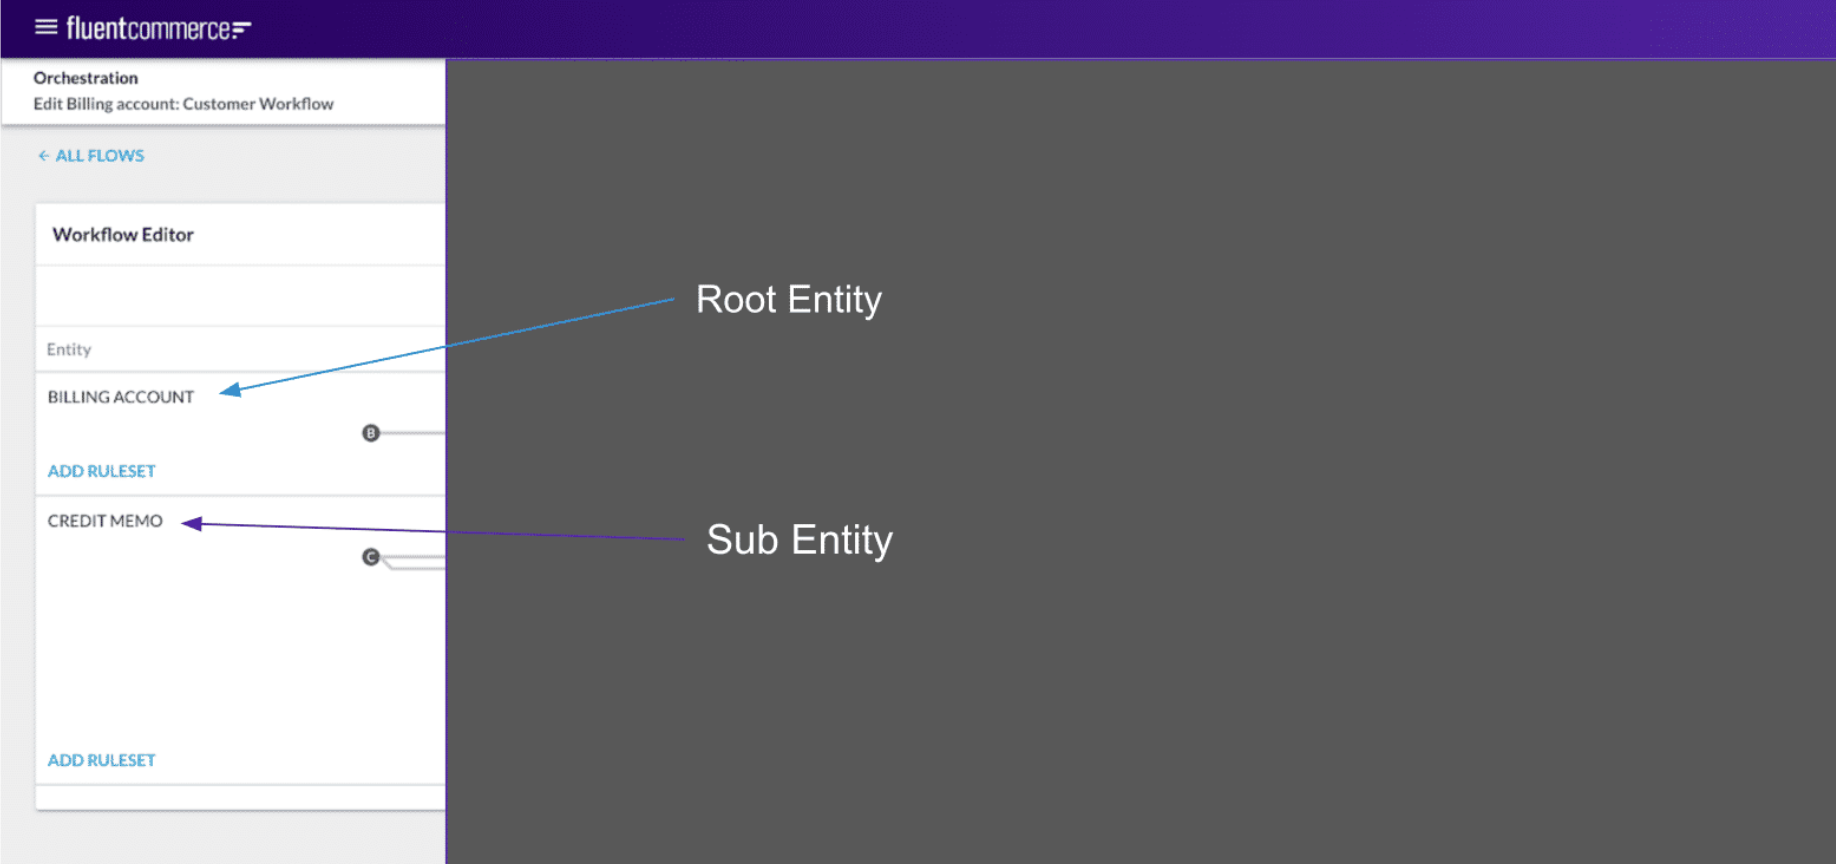
What Workflow Builder allows users to do
Within the Workflow Builder, there are many functions that you can perform, including:- Add and configure rules, rulesets and triggers.
- Configure rules at every stage of the workflow.
- Configure user actions for UI integration.
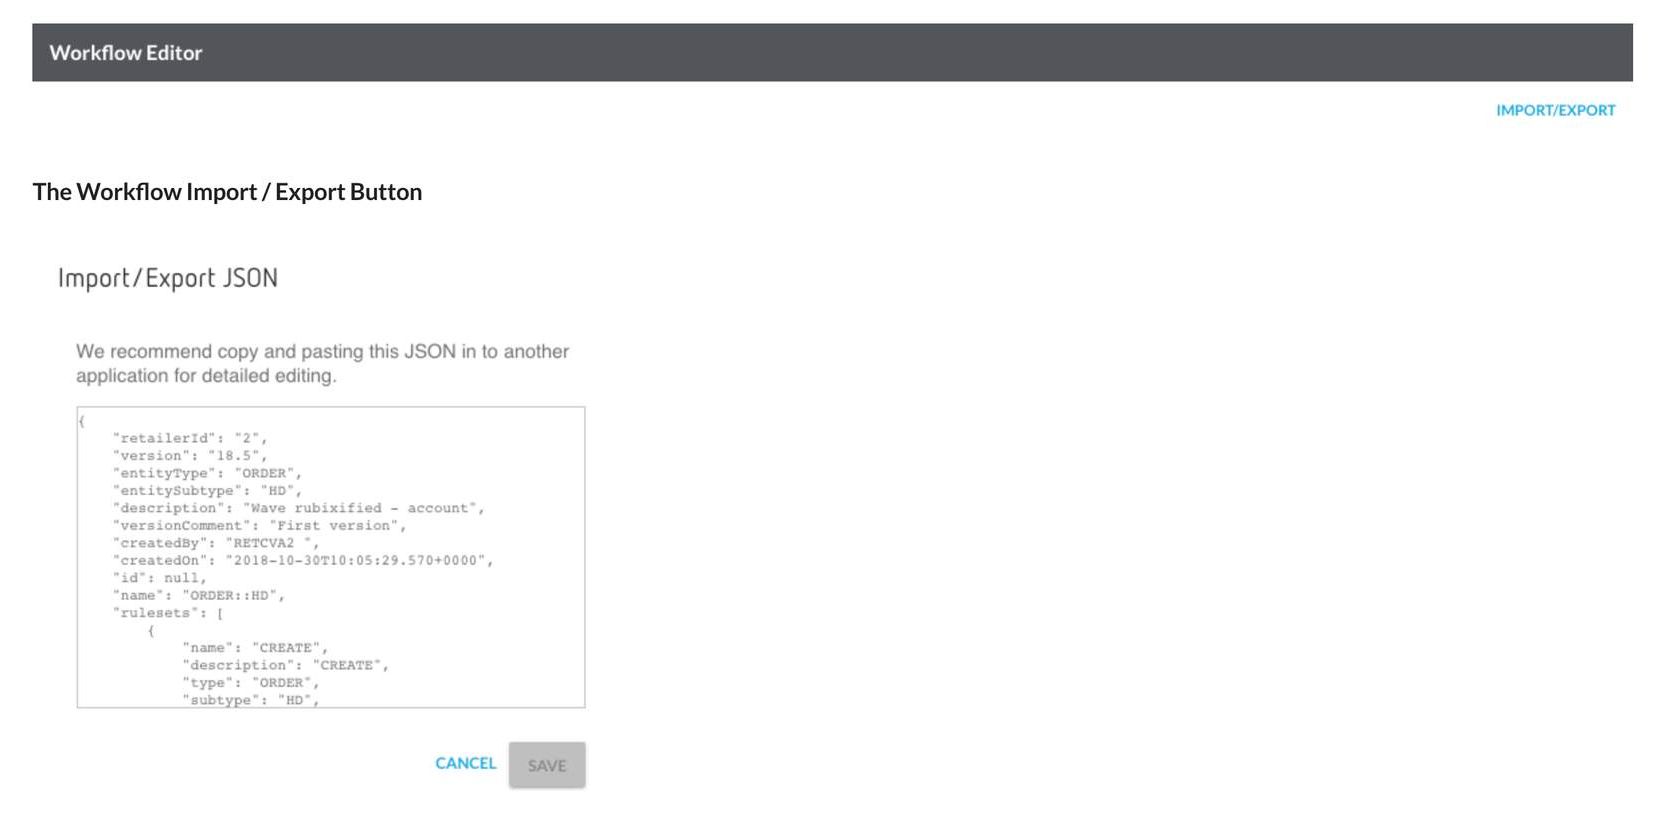
- Add/change states via JSON, and save via the workflow builder. The Workflow builder always only increments the minor version number of save— if a new major version is required this can be done via the JSON and/or API.
- Configure states and transitions to match the client's business process.
- States, Events and Triggers
- Rules and Rulesets
- Actions and User Actions
- Versioning — each workflow is versioned and saved using the standard format: <major>.<minor> for more information about versioning go to Lingo
Workflow Access
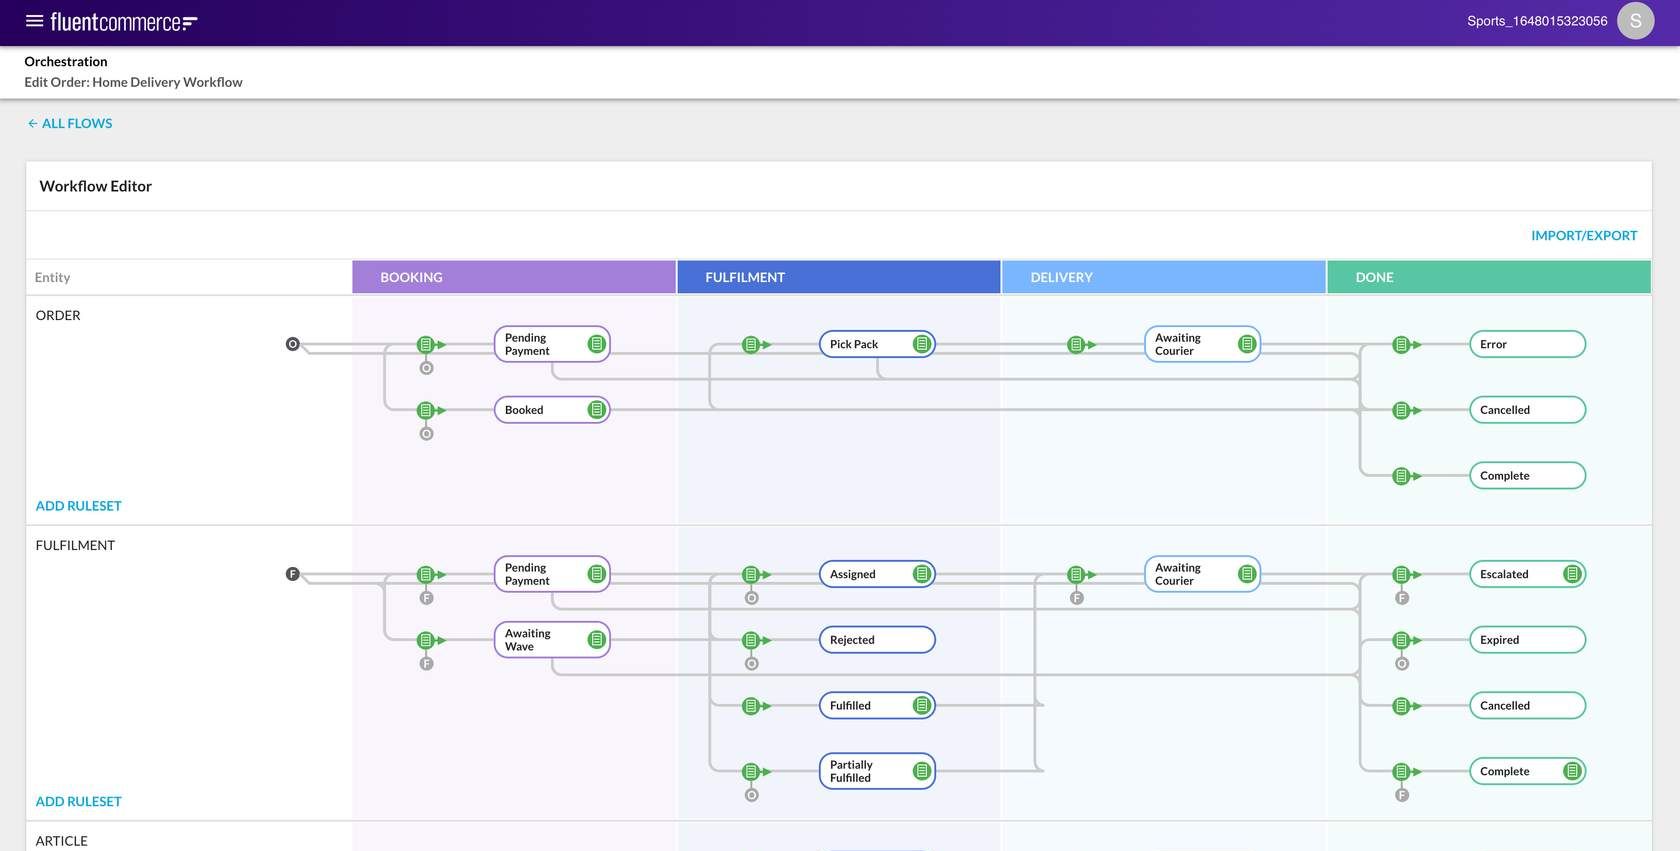
Workflows are accessed via the Workflow Builder through a Fluent Web App. An example of the Order: Home Delivery Workflow is shown below. Note: Each entity type has its own workflow — A Home delivery order (HD) and a click & collect order (CC) each have their own workflows: ORDER:HD and ORDER:CCWorking with Workflows
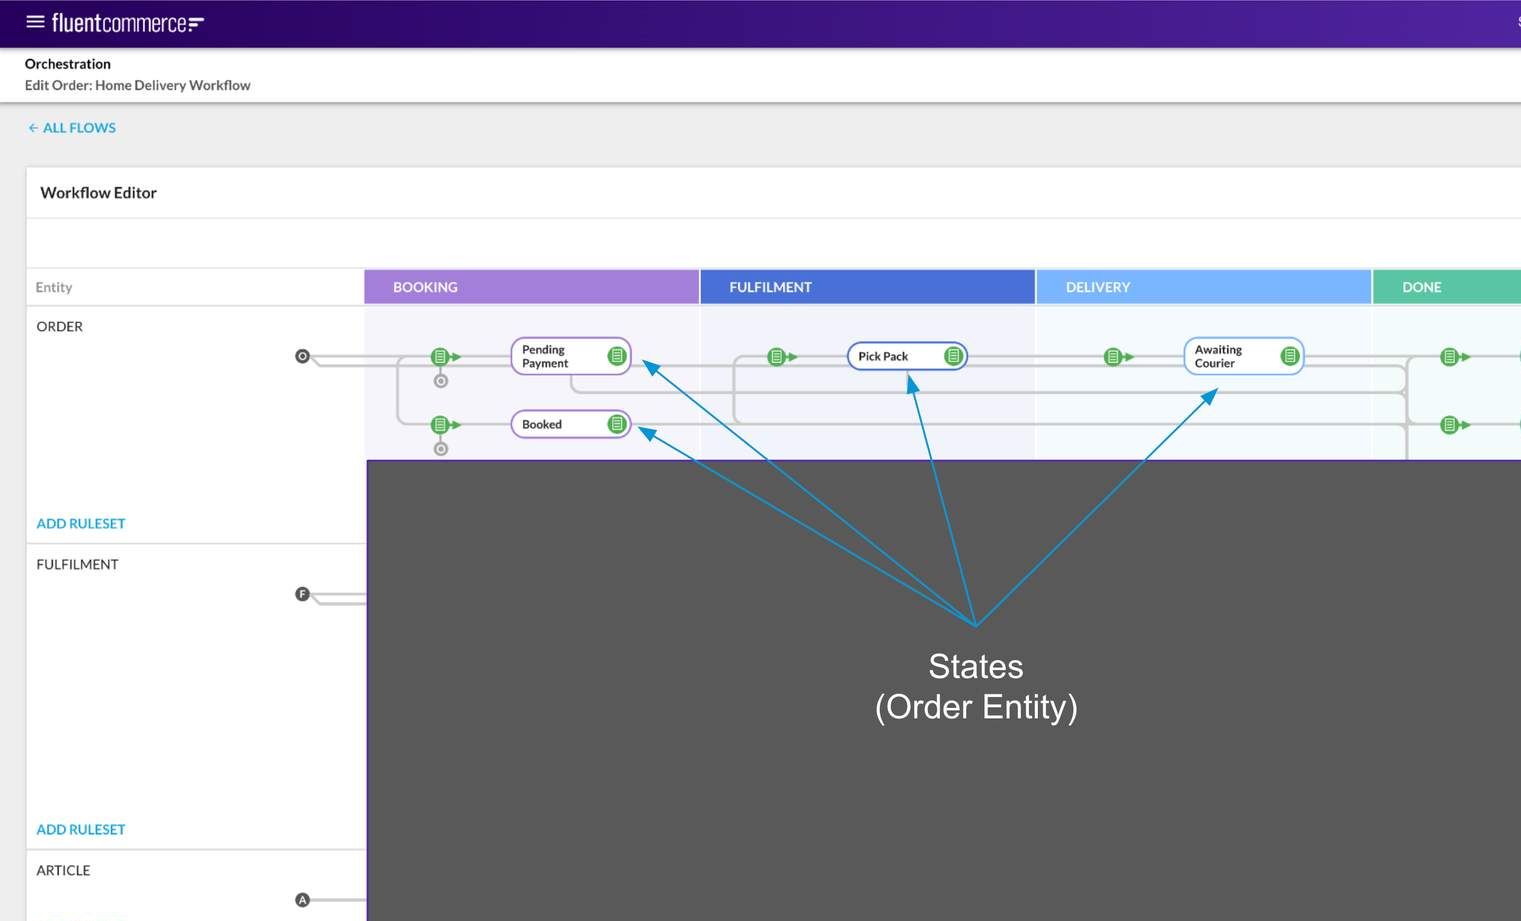
Login to the Web App, and click on Orchestration (1) on the left-hand navigation bar. The Orchestration section contains tabbed lists of workflows per domain. e.g. ORDER (2)If you click on a Workflow title (e.g. HOME DELIVERY) a view of the workflow is displayed. If there are sub-entities involved as part of the overall lifecycle of the domain root entity, they are also displayed in the swim lanes (vertical columns) below the main flow. - Lifecycle Phases (or Categories) — the vertical coloured columns (swim lanes) represent the lifecycle phases (or categories) of the given entity.
- Statuses — Statuses (States) within the workflow are represented by the white rounded rectangles with a border colour matching the lifecycle phase they belong to.
Working with Rulesets, Triggers & User Actions
Working with Rulesets
Rulesets define the rules that are executed when an Event matching the trigger criteria is received by the Workflow Engine."In the image shown below, green icons represent one or more Rulesets.- Rulesets inside of the Status rounded rectangles are triggered on that State.
- Rulesets outside of a Status transition the entity to the state in which its line and arrow indicate.
 You can add new Rulesets via either an existing Ruleset list or via the Entity Workflow Swim lane. Clicking on the green icon reveals a list of Rulesets configured within that state or transition.Each Ruleset displays the following:
- Name of the Ruleset
- Statuses for which the Ruleset applies
- Trigger description
- List of Rules and/or User Actions
 Note: Ruleset Name is required as part of the Event that would Trigger the Ruleset to run.Clicking on a Ruleset Name brings up its details on a slide-out panel on the right-hand side of the screen:
- The panel has the following sections:
- Trigger
- User Actions
- Rules
- Attributes (optional depending on rule configuration)
 Each of these sections can expand or collapse by clicking on the section header. The expand / collapse feature makes it much easier to work with large Rulesets.
Working with Triggers
Trigger statuses define when a Ruleset is valid t execute for a given entity. e.g. a change to the delivery address of a Home Delivery Order may only be applicable while the Order is in a Booked State. This section provides a Description text box and a Statuses selector: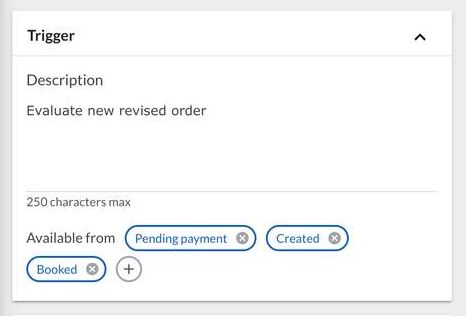
Working with User Actions
User Actions provides the option to link human interactions and automated workflows and allows orchestrated business logic to apply to buttons on the Fluent Web Apps. To configure a User Action, click on the Add User Action button — this will slide out an additional screen section to the left of the Edit Ruleset area. Configuring User Actions involves linking a Button Configuration with a Trigger and a Ruleset. The Button Configuration captures the Button Label, Button Type (type of button), Module Selector (Modules to be displayed), and Confirmation Required check
- Button Label —is a required field and provides the label that will be printed on the button when displayed on the User Interface.
- Button Type — is a required field and can be either Primary or Secondary. This indicates whether the button is displayed as a Primary or Secondary action in the UI. Secondary actions may not be visible without clicking on an ellipses button for extended options first.
- Modules selector — allows users to assign the Button to a web app. At least one Module is required.
- Confirmation Required checkbox — indicates whether or not the UI should prompt the user for confirmation of the action, prior to execution.
Working with Rules
The Rules section is where all the Rules in the Ruleset are displayed. The Rules in a Ruleset will be executed in the order displayed, from top to bottom. Clicking the Add Rule button brings up the Rule Library panel on the left of the Ruleset panel. Here, you will find a list of all available Rules based on which Rule Plugins are installed (and Active) for the given Account and Workflow. You can add, change, or remove Rules in this section, as well as use drag and drop to change the order of execution.Most Rules will provide input areas for their required parameters or configuration. E.g. the Change State Rule requires the new Status to be provided so that the Rule knows what state to change the entity to.
- Search box: quickly find any Rules by filtering the Rule List as you type. Clicking on a Rule within the list will add it to the Ruleset Rules section, in readiness for the configuration of required input parameters.
- Input Parameters: Rules in most cases require specific input parameters in order to execute their intended logic. These will be displayed, and provide a mechanism with which to capture the values. Where possible, these will be data type relevant.
 Rules in a Ruleset will be executed in the order displayed, from top to bottom. You can add, change, or remove Rules in this section, as well as use drag and drop to change the order of execution.
- Changing Order: You can change the order of the Rules in the Ruleset by drag and drop.
- Removing a Rule: To remove a Rule, click the TrashCan icon on the right side of the Rule, visible on mouse over.
Module 3. Workflow patterns and practices
Composing Workflows
In this module, we return to the concept of Rules as the building blocks for the Rulesets. We’ll also cover some guidelines for designing Rules.You are shown two different Lego configurations below, an: Angel (Left) and Poseidon (Right). Take a minute to inspect both configurations. When you're ready....scroll down to reveal some ideal responses.
 Multiple instances of a Rule are a design intention.
 Each Ruleset executes in sequence for the given context or event.
 Recommended practice regarding the naming convention for RulesetsEach Ruleset should only have a single purpose. And, a Ruleset that changes the state of an entity, should be clearly named to reflect that purpose. This is done so that a Workflow is easy to read, and thus becomes easier to support.The diagram on the right shows an example, as well as a non-example of this recommendation.
 Key takeaways and Best Practices:A Rule consists of two components:
Ideal responses:
In the left image, the little lego wing piece has been composed together with other pieces to form an Angel. In the right image, the same lego piece is composed together with many other lego pieces to form a Poseidon.The visual analogy demonstrates how rules should be:- Small, isolated single-purpose building blocks, that on their own are not that useful
- Reusable and composable with other rules
- Are the smallest building block for a task (ruleset) in a process
- are composed of one to many building blocks
- may reuse rules from other rulesets one or more times
- combine to perform a specific purpose or task within a process
Let’s dig a little deeper:
In the case of the Angel, the piece portrays an angel wing, while in the case of the Poseidon, the piece is composed of other instances and forms a moustache, beard, and eyebrows. This is what rules are in the workflow framework — they can be composed together with other rules in a ruleset to form a completely unique outcome. Example: One ruleset may perform a certain task, while another ruleset composed of the same rule along with other rules performs a completely different task.Below is an example of a Ruleset (Ruleset A) showing 4 Rules (rules 1 to 4) configured within it. It illustrates the key concepts of rules execution, specifically:- Every Rule in the Ruleset is executed in sequence.
- A Rule may or may not produce an outcome - i.e. it is conditional.
Multiple instances of a Rule are a design intention.Each Ruleset executes in sequence for the given context or event.Recommended practice regarding the naming convention for RulesetsEach Ruleset should only have a single purpose. And, a Ruleset that changes the state of an entity, should be clearly named to reflect that purpose. This is done so that a Workflow is easy to read, and thus becomes easier to support.The diagram on the right shows an example, as well as a non-example of this recommendation.Key takeaways and Best Practices:A Rule consists of two components:- The Rule Condition
- The Outcome (Action)
- Designed for a single purpose — they should do only one thing and produce only one action (if the Rule Condition is met).
- Simple, isolated and reusable — only use a few lines of code. The key is not to lock away logic into the code. This idea aligns with a core value proposition we're trying to promote of flexibility and readability.
- Reused, try and reuse as many of the Rules as possible. It might just be that their parameters are configured slightly differently or they may be in a slightly different sequence — that's our intention.
- Aim to provide meaningful, descriptive names so that the workflow becomes self-describing and intuitive.
- Try to align the name according to the piece of logic or function the Ruleset is performing within the workflow. This makes it easier for other people to review a workflow and understand its intention.
Examples of use cases when best practises are applied:
- If there's a change in business requirements, it's easier to go in and make one, quick change.
- Having single-purpose, isolated Rules simplifies the troubleshooting process, making it easier and faster to navigate the workflow, and pinpoint and resolve issues.
- Perform a single function (E.g: CancelOrder) OR
- Perform a logical gate for directing execution flow by using If/Else logic OR
- Perform a State Management (E.g: SetAwaitingPayment) OR
- Perform another purpose such as notifying other orchestration contexts or other domains. (E.g. If an order comes in, notify the Inventory Catalog to reserve the product at that particular location — You will learn more about logical gates & state Management in the next lesson.
Logical Gates
When it comes to workflow designs, different patterns can be achieved. In this section, we'll look at one of these patterns called Logical Gates, followed by a 'best practice' example.Logical Gates A Logical Gate may also have multiple possible paths, such as in the evaluation of an ENUM, but, a Logical Gate Ruleset only produces a single outcome, typically an inline event to process the next Ruleset. For example, evaluating X to select one of the three branches (A or B or C) to continue processing.Example: The evaluation of the shipping method that was selected during the order process.
 Logical Gate ScenarioFor this scenario, let's assume that the client has a simple requirement:If the order is above $500 annotate it as High Value, and Check for Fraud, else Book the Order.As you can see here, only one of those conditions can ever resolve to TRUE at any given point in time, thereby providing only a single output path from this Ruleset at any time.
 Recommended Practice
- A Logical Gate is where the direction of the workflow execution depends on specific conditions being met, i.e. some kind of a logical condition that needs to be satisfied- so that the workflow knows which branch to execute next.
- Each Logical Gate involves a simple condition that evaluates to either TRUE or FALSE. This is represented by the diagram on the right.
- As seen in the diagram here:
- X is evaluated here, where X could be an Event Attribute, an Entity Field, etc.
- If X is found to be TRUE, then then X is sent to Branch A for further processing
- Else, it is sent to Branch B for further processing.
A Logical Gate may also have multiple possible paths, such as in the evaluation of an ENUM, but, a Logical Gate Ruleset only produces a single outcome, typically an inline event to process the next Ruleset. For example, evaluating X to select one of the three branches (A or B or C) to continue processing.Example: The evaluation of the shipping method that was selected during the order process.- Depending on what was selected, X will be sent to either branches A, B or C for further processing.
Logical Gate ScenarioFor this scenario, let's assume that the client has a simple requirement:If the order is above $500 annotate it as High Value, and Check for Fraud, else Book the Order.As you can see here, only one of those conditions can ever resolve to TRUE at any given point in time, thereby providing only a single output path from this Ruleset at any time.Recommended Practice- Logical Gates evaluate a simple condition by composition of rules
- Only 1 event (ever) output from the Ruleset
- Used for flow control, no other actions or outcomes should be present
Managing States
Another aspect of workflow patterns is Managing State. So, in this section we'll look at some recommended practices around Managing State.Firstly, changing the status of an entity.Don't change the status of an entity until all conditions of that state have been confirmed. Where possible, group required rules into a single ruleset for the task. For example, if there is a requirement to capture a reason for cancelling on order cancellation, then this rule can live in the same ruleset as the change state to cancelled rule. Secondly, avoid duplicating logic within a workflow.Don't duplicate logic unnecessarily within the workflow - this makes the workflow harder to maintain, and may result in unexpected differences in behaviour between the different tasks. The workflow should be readable and simple.Example: Avoid having more than one Change of State action for each state.
 And finally, you must always use ChangeStateGQL to change the state of an entity. Use the ChangeStateGQL rule to change status, as this will ensure that the workflow engine can track the state change and update the context appropriately. If any status changes are made via direct mutation, the workflow engine would not know about this change, and may result in incorrect ruleset matching logic during event execution.Note to Developers using the Rules SDK: You should never set a new status on an orchestrateable entity via mutation action. Always let the workflow configurator use the standard change state rule.Lastly, even if you are able to call an API from within a rule, (a Mutation can be called from within a rule, as it is just a GraphiQL API) and Change the State of that entity from within the rule, it is recommended that you never do this. As this would mean that all that logic will be hidden inside the Java code where no one knows it exists. Why does this matter?Imagine-if someone else were to use that same rule and drop it into another part of the workflow, then their workflow will change states, even if it was not intended. And, that in turn might need additional time and effort to identify and resolve.So, always use the ChangeStateGQL rule that's provided out-of-the-box, so that the workflow engine is able to track and be aware of any entity state changes in order to ensure the event context is valid during processing.
  Recommended Practices
Secondly, avoid duplicating logic within a workflow.Don't duplicate logic unnecessarily within the workflow - this makes the workflow harder to maintain, and may result in unexpected differences in behaviour between the different tasks. The workflow should be readable and simple.Example: Avoid having more than one Change of State action for each state.And finally, you must always use ChangeStateGQL to change the state of an entity. Use the ChangeStateGQL rule to change status, as this will ensure that the workflow engine can track the state change and update the context appropriately. If any status changes are made via direct mutation, the workflow engine would not know about this change, and may result in incorrect ruleset matching logic during event execution.Note to Developers using the Rules SDK: You should never set a new status on an orchestrateable entity via mutation action. Always let the workflow configurator use the standard change state rule.Lastly, even if you are able to call an API from within a rule, (a Mutation can be called from within a rule, as it is just a GraphiQL API) and Change the State of that entity from within the rule, it is recommended that you never do this. As this would mean that all that logic will be hidden inside the Java code where no one knows it exists. Why does this matter?Imagine-if someone else were to use that same rule and drop it into another part of the workflow, then their workflow will change states, even if it was not intended. And, that in turn might need additional time and effort to identify and resolve.So, always use the ChangeStateGQL rule that's provided out-of-the-box, so that the workflow engine is able to track and be aware of any entity state changes in order to ensure the event context is valid during processing. Recommended Practices- Only set new Entity States when the State is meaningful
- Don't set the same state from multiple Rulesets
- If and where possible, handle all state logic within a single execution thread, including child actions
- Only Change State using the dedicated ChangeState rule/action, and not together in a different mutation
- Consider using more states to help alleviate the discrepancies in meaning
- Use Ruleset triggers appropriately for helping to guard against illegal actions on states
- Identify Intervention states, such as FRAUD_CHECK, PAYMENT_FAILED, UNFULFILLABLE
Process Flows
For each process (a process is a business logic within the workflow) in the workflow - one or more rulesets should be executed inline within the execution context.  Example: UPSERT Inventory Use Case.For the purpose of this example, let us assume that an event is fired with details about an Inventory Position that may or may not yet exist.
 Recommended Practice
- As far as a process flow is concerned, it can be initiated at either the Root Entity level or directly at the Sub-Entity level.
- And, within a single thread of execution, a process may flow across the same entity, down to a sub-entity, or back up to the parent or root entity.
Example: UPSERT Inventory Use Case.For the purpose of this example, let us assume that an event is fired with details about an Inventory Position that may or may not yet exist.- The event is fired against the Inventory Catalogue.
- The Inventory Catalogue is then responsible for determining whether or not the position exists, before forwarding the flow appropriately.
- Either way an Inventory Position update includes either a new Inventory Quantity, or an updated Inventory Quantity, prior to recalculating the onHand value on the position level again.
Recommended Practice- For each event received in the workflow engine, all rulesets triggered-off that event for the same context should be executed "inline". Rather than breaking the flow for a specific set of automated tasks in a process, they should be completed as part of a single transaction.
- Business logic should be visible in the workflow
- States should be meaningful and used appropriately
- Use meaningful Ruleset names and Rule names.
- Make sure Logical Gates are in the workflow, not in the rules
- Don't build cyclic flows (loops) into your workflow
- There is no parallel processing control. Don't Split and Merge within a single event or controlled transaction. Each rule and ruleset is executed in series on a single thread, and each action is applied in the order it was produced.
Scenario (Recommended Practice)
Now, let's look at a scenario that demonstrates the benefits of following the recommended practices that we've seen so far.
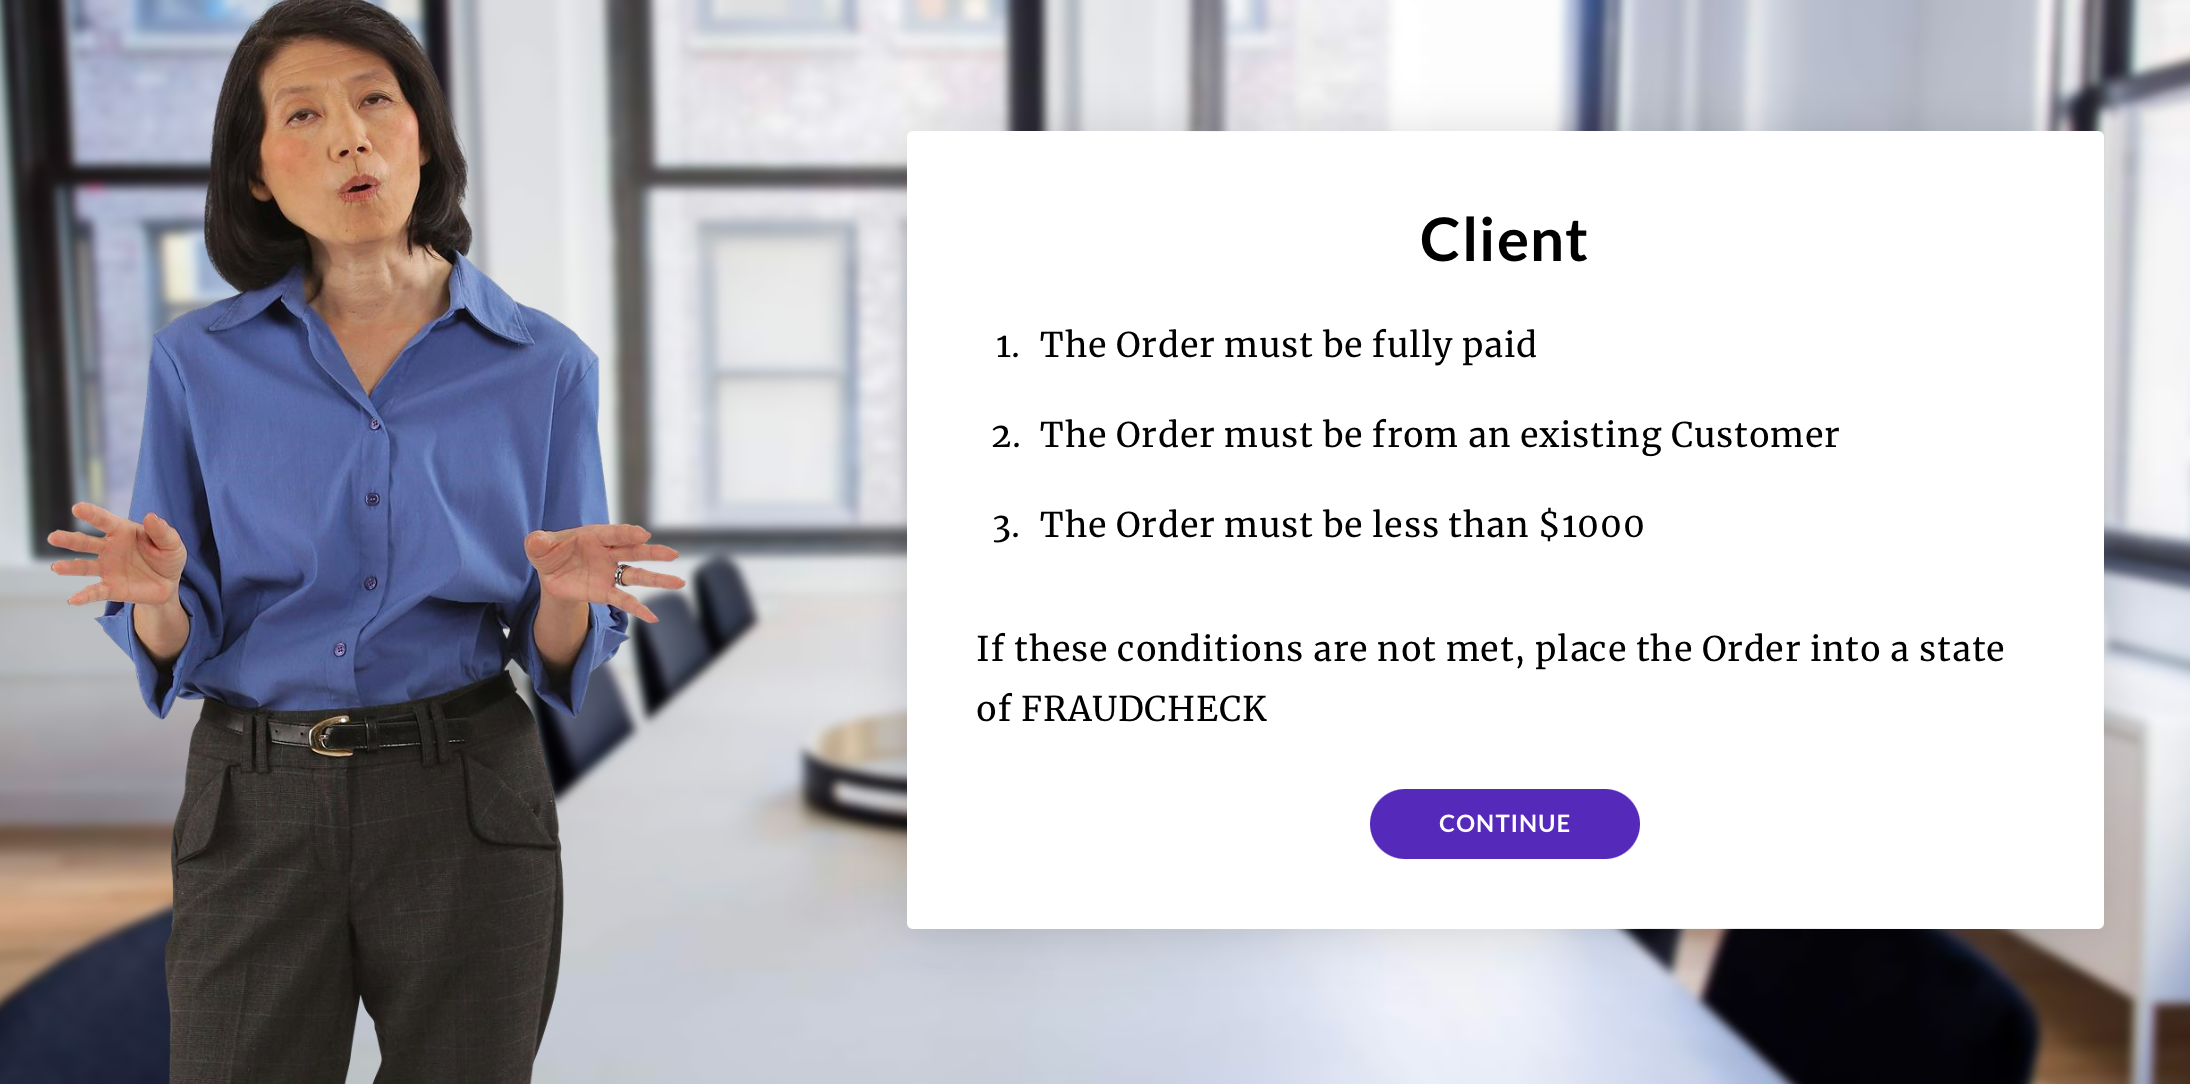

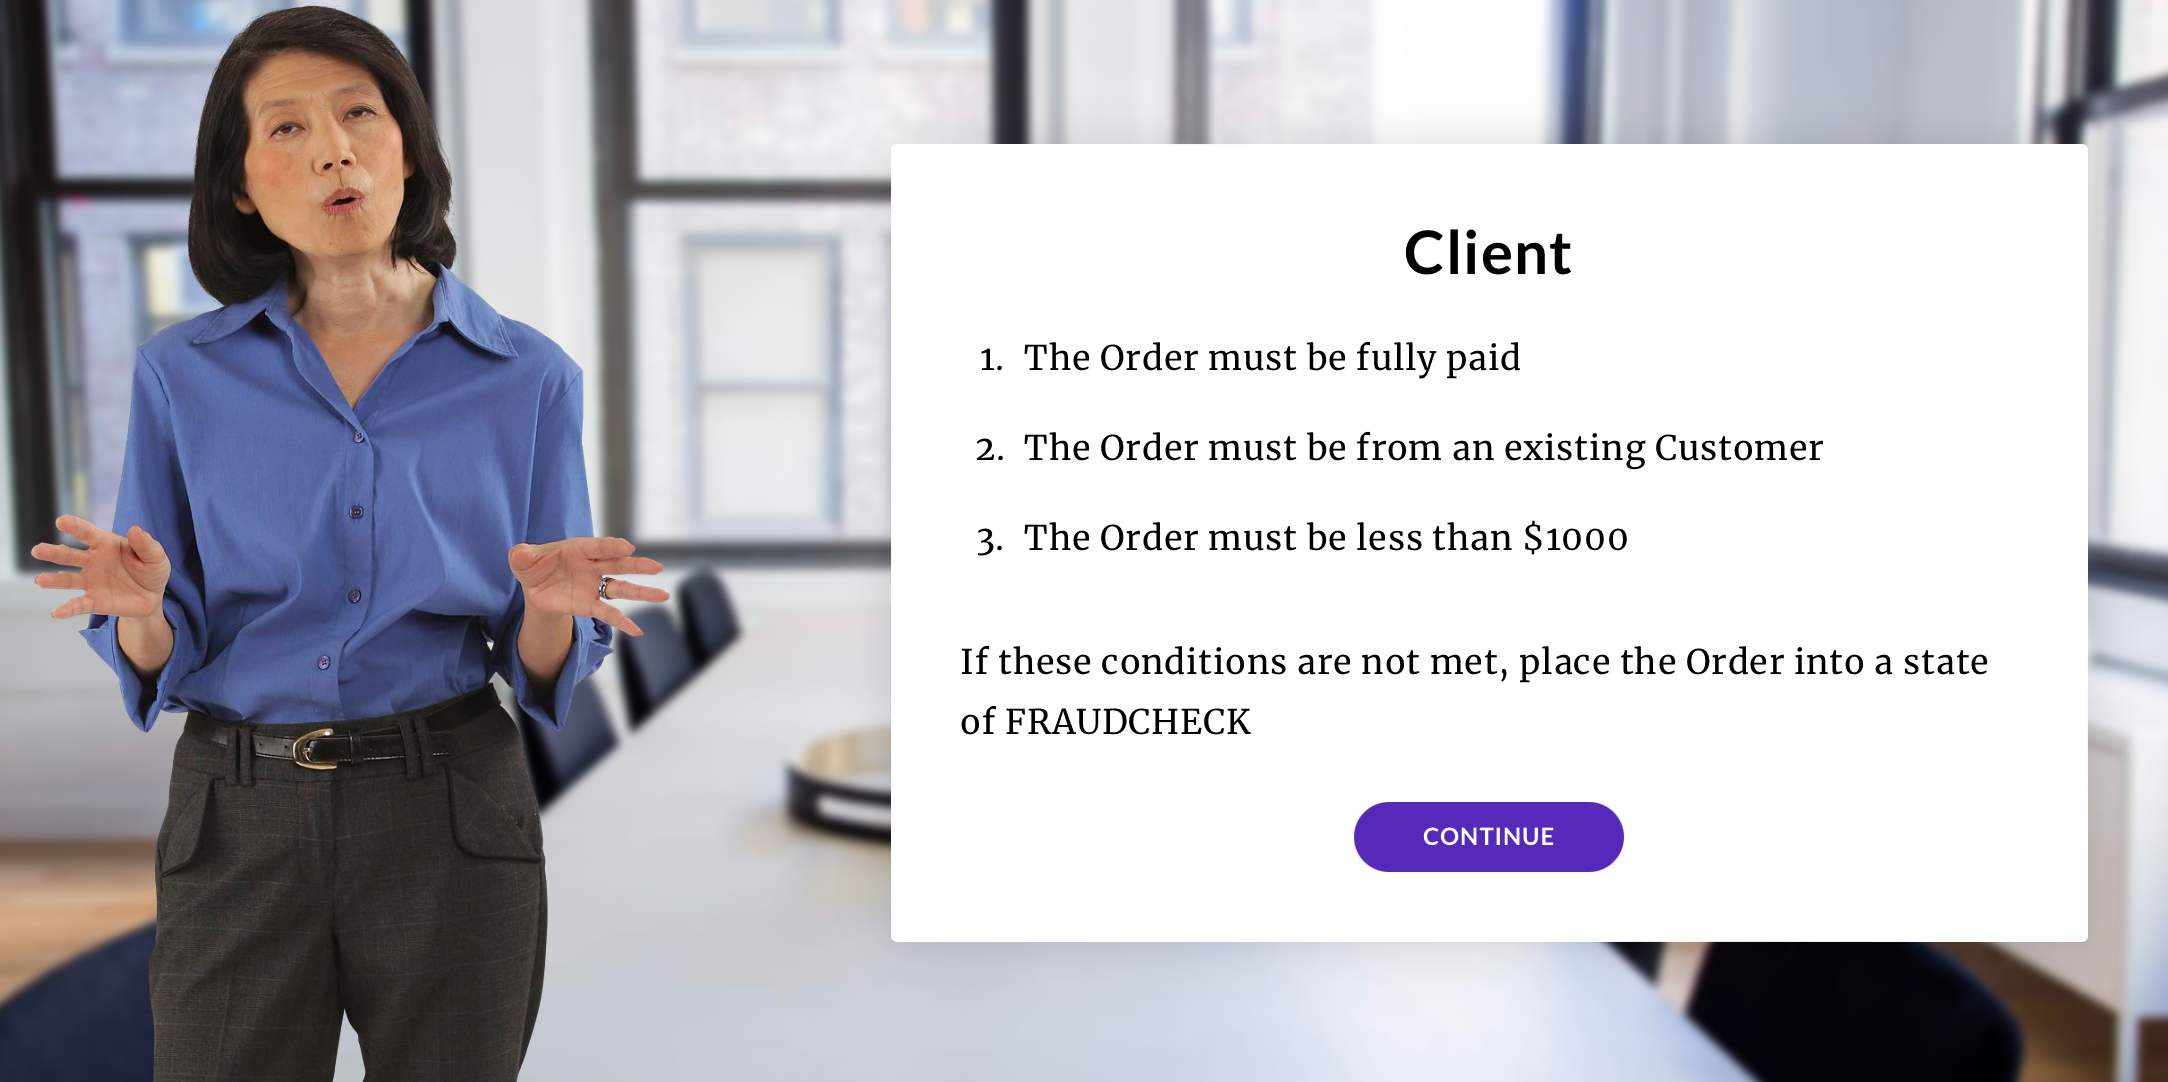
 Here's what the partner creates... They take all three of the client's requirements and build it into a single Rule.
 3 months later the client comes back with a request to update one of their requirements.
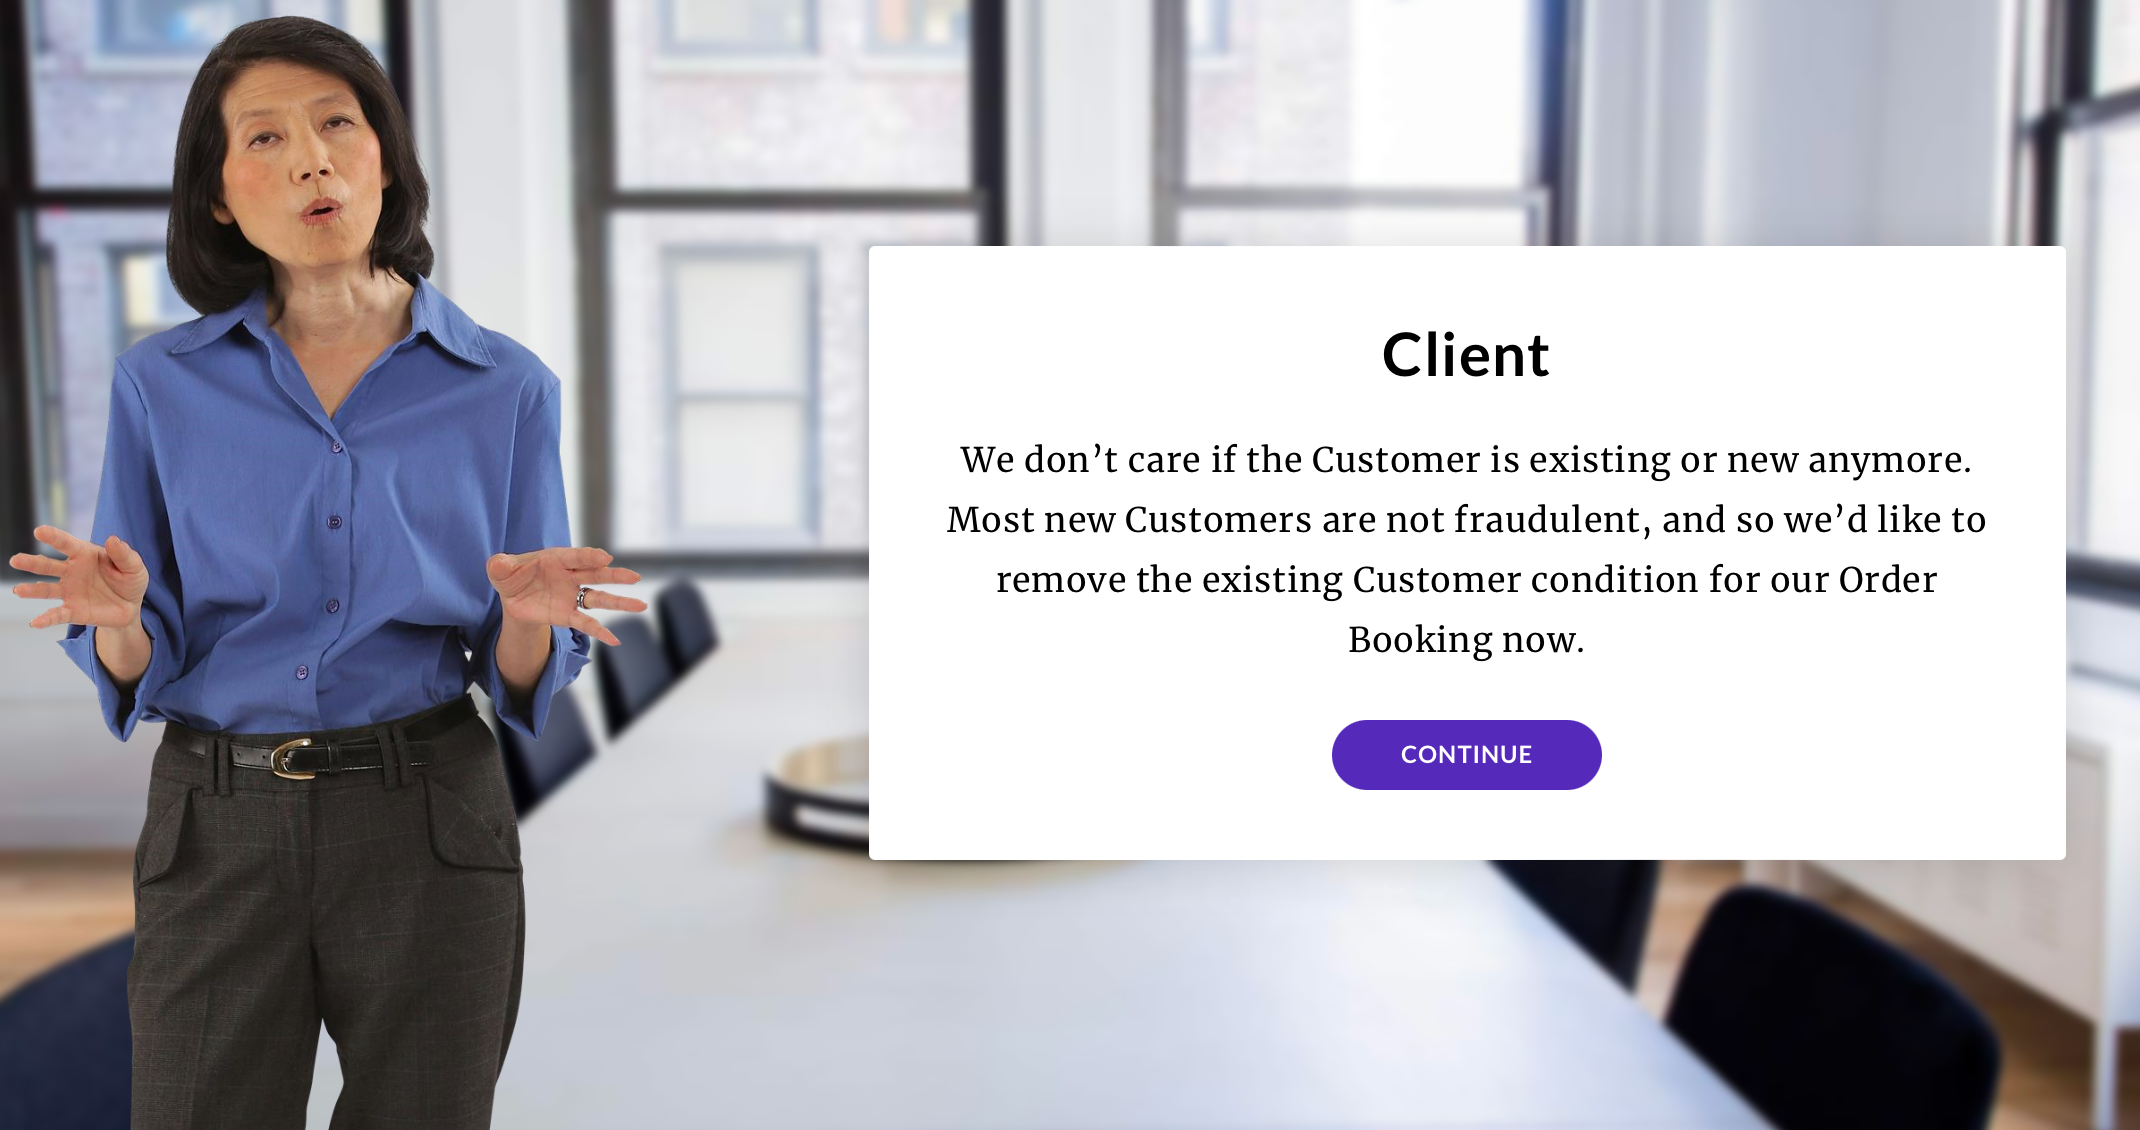
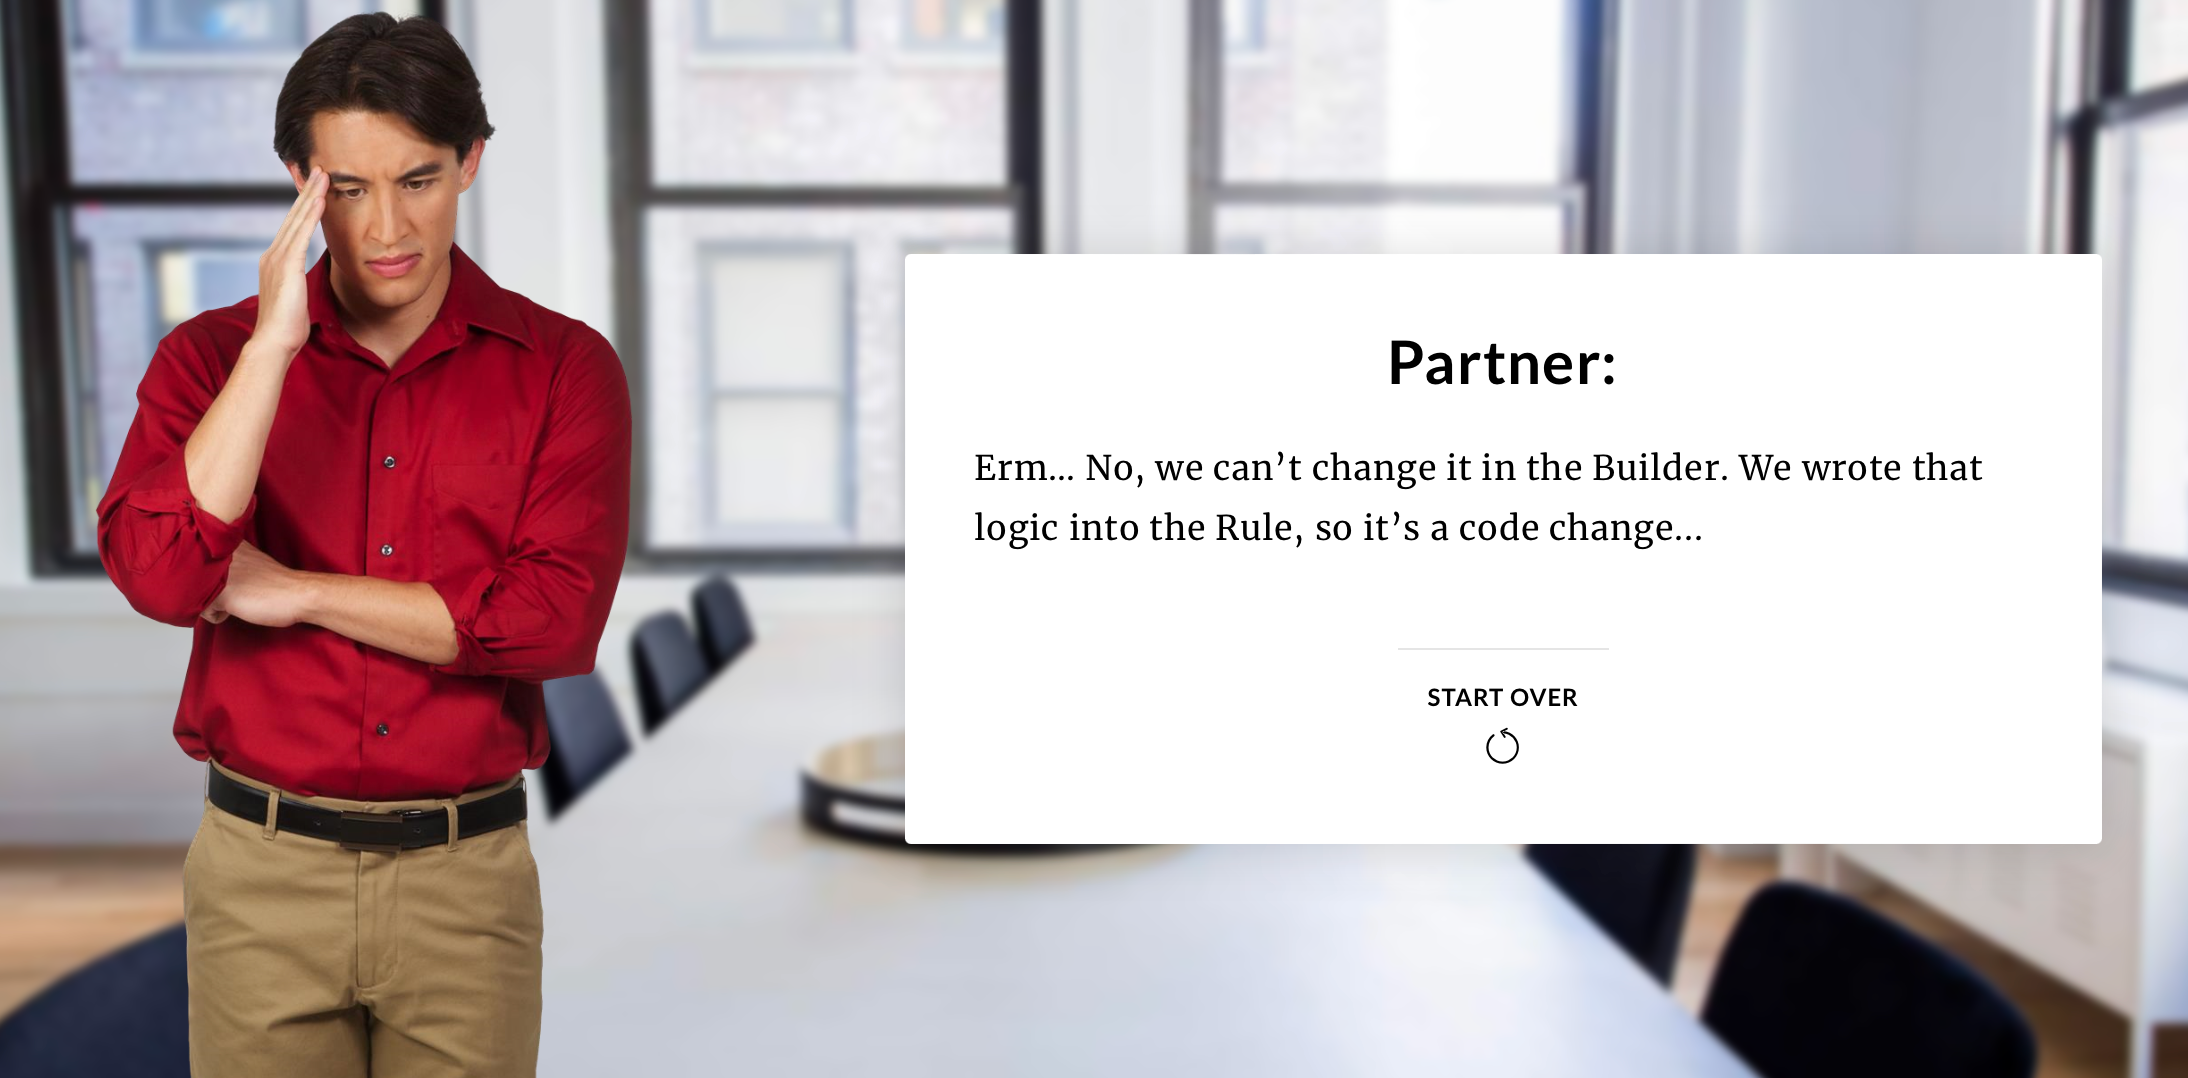
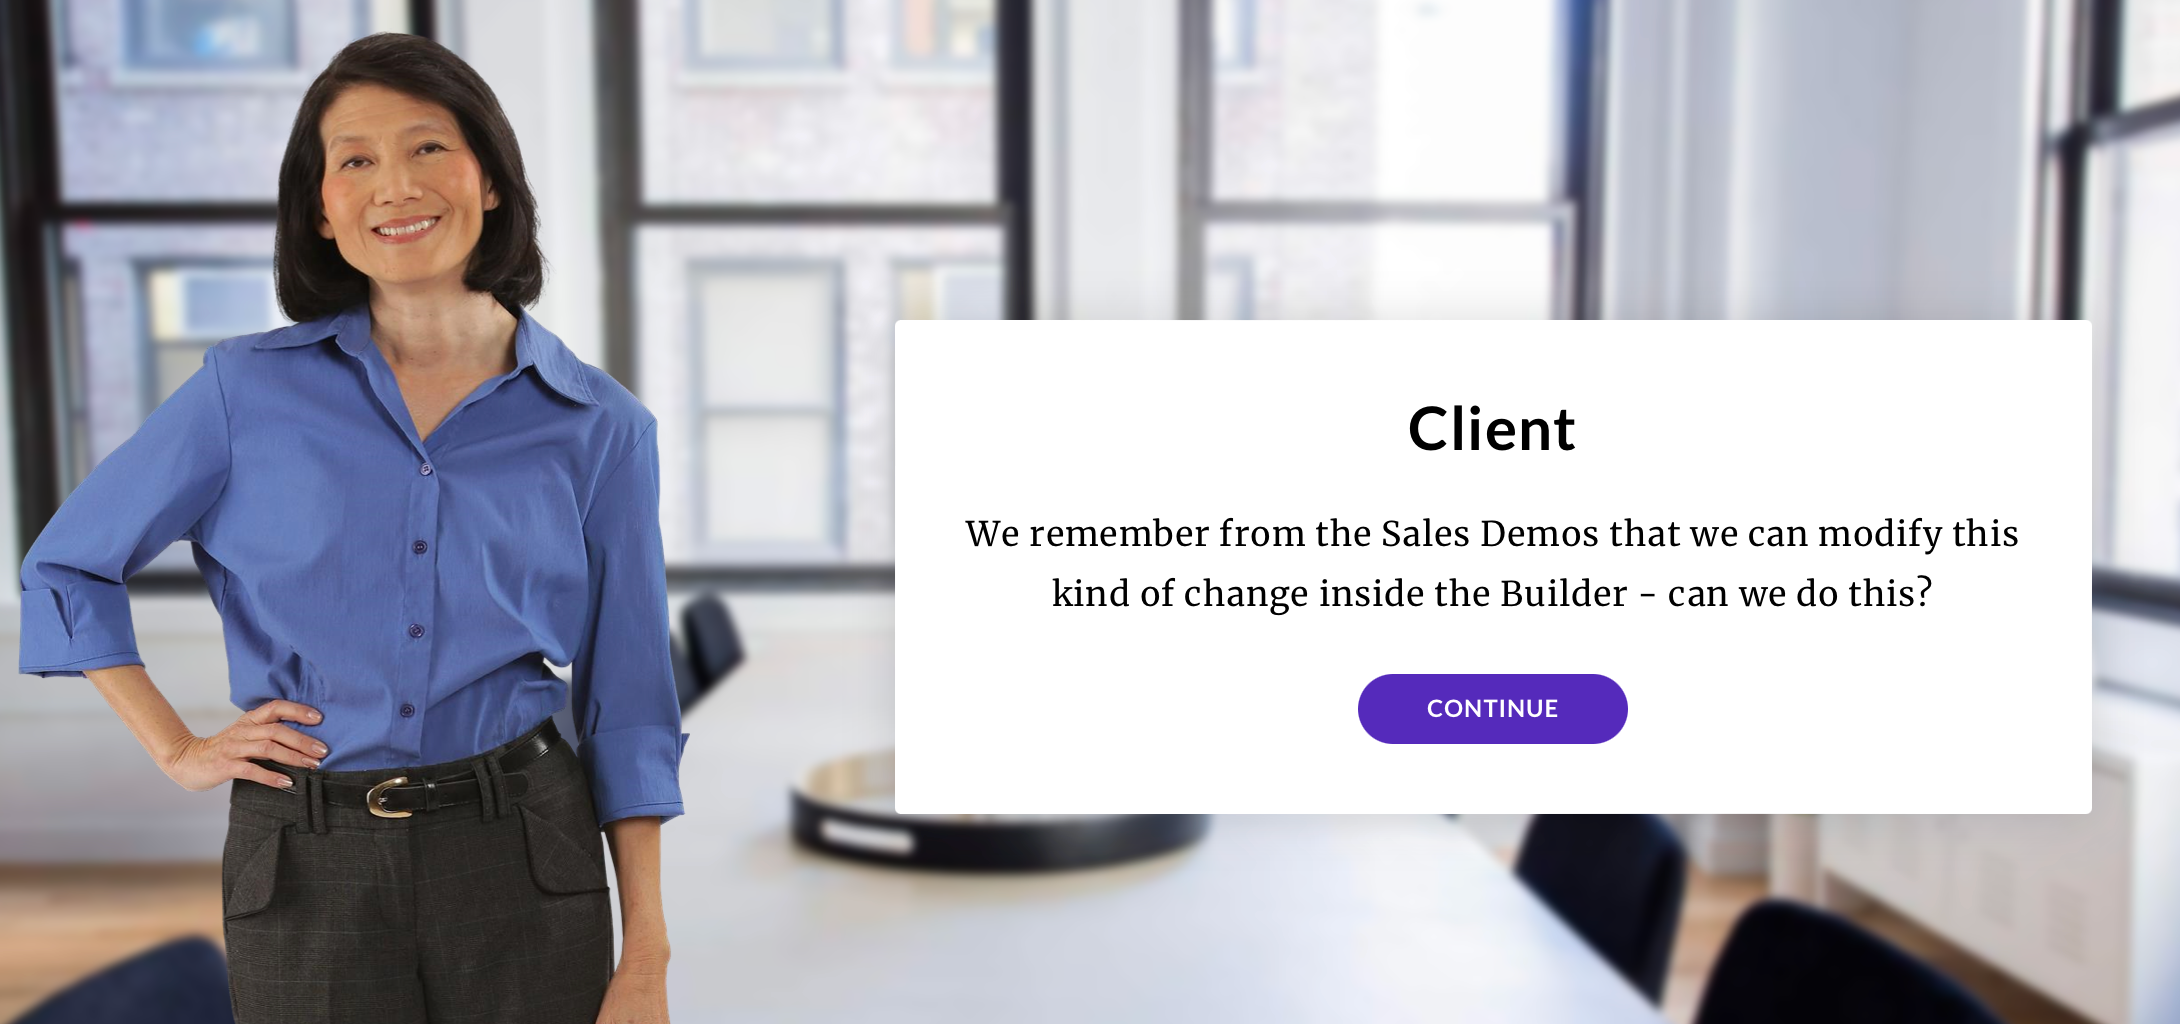
 Now, let's look at the same scenario, but with a different Partner who follows the Best Practice advice and keeps logical gates isolated to their own Ruleset.
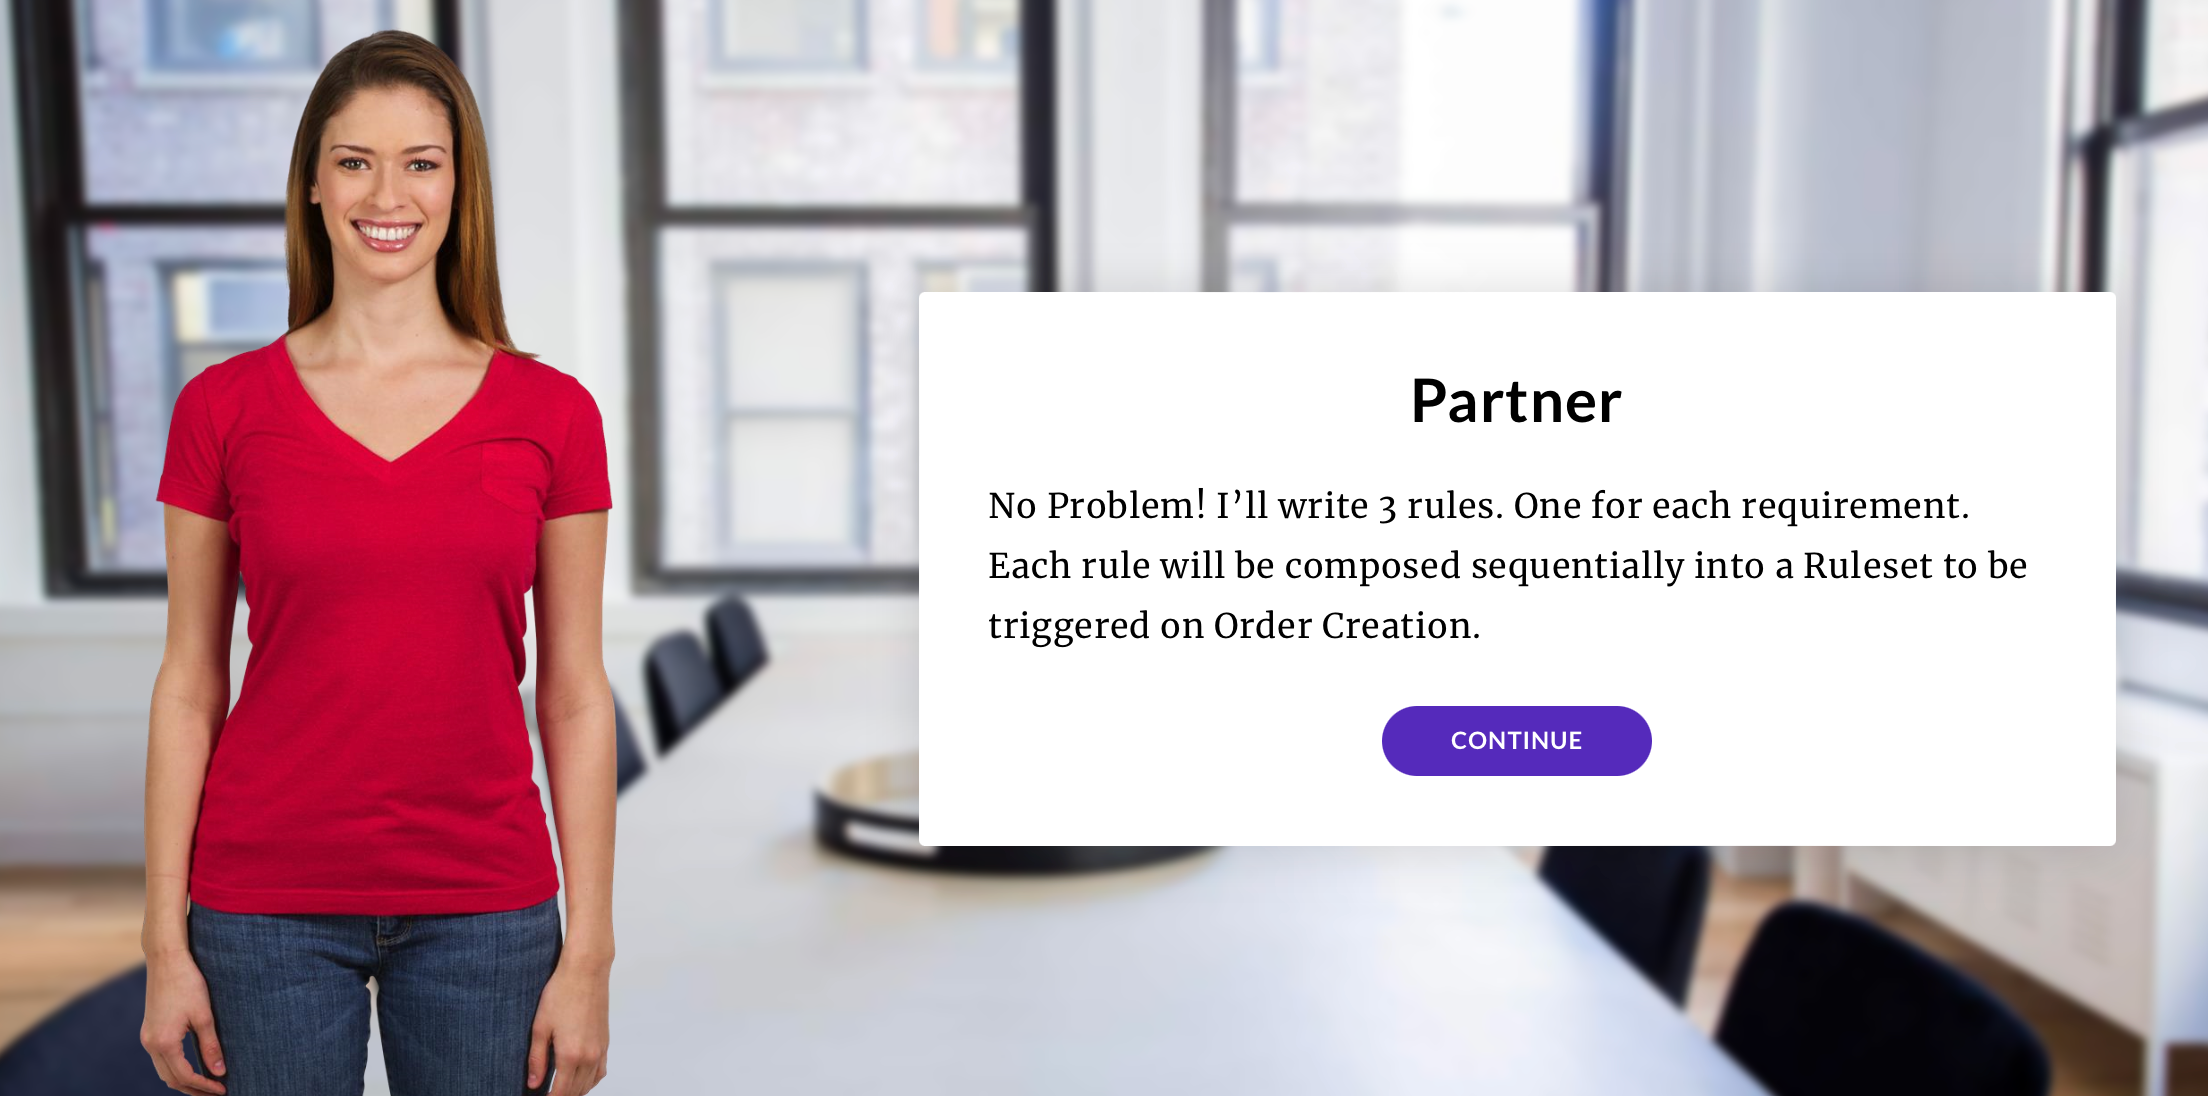

 Here's what the partner creates... They take the client's requirements and build a separate Rule for each of them.
 3 months later the client comes back with a request to update one of their requirements.
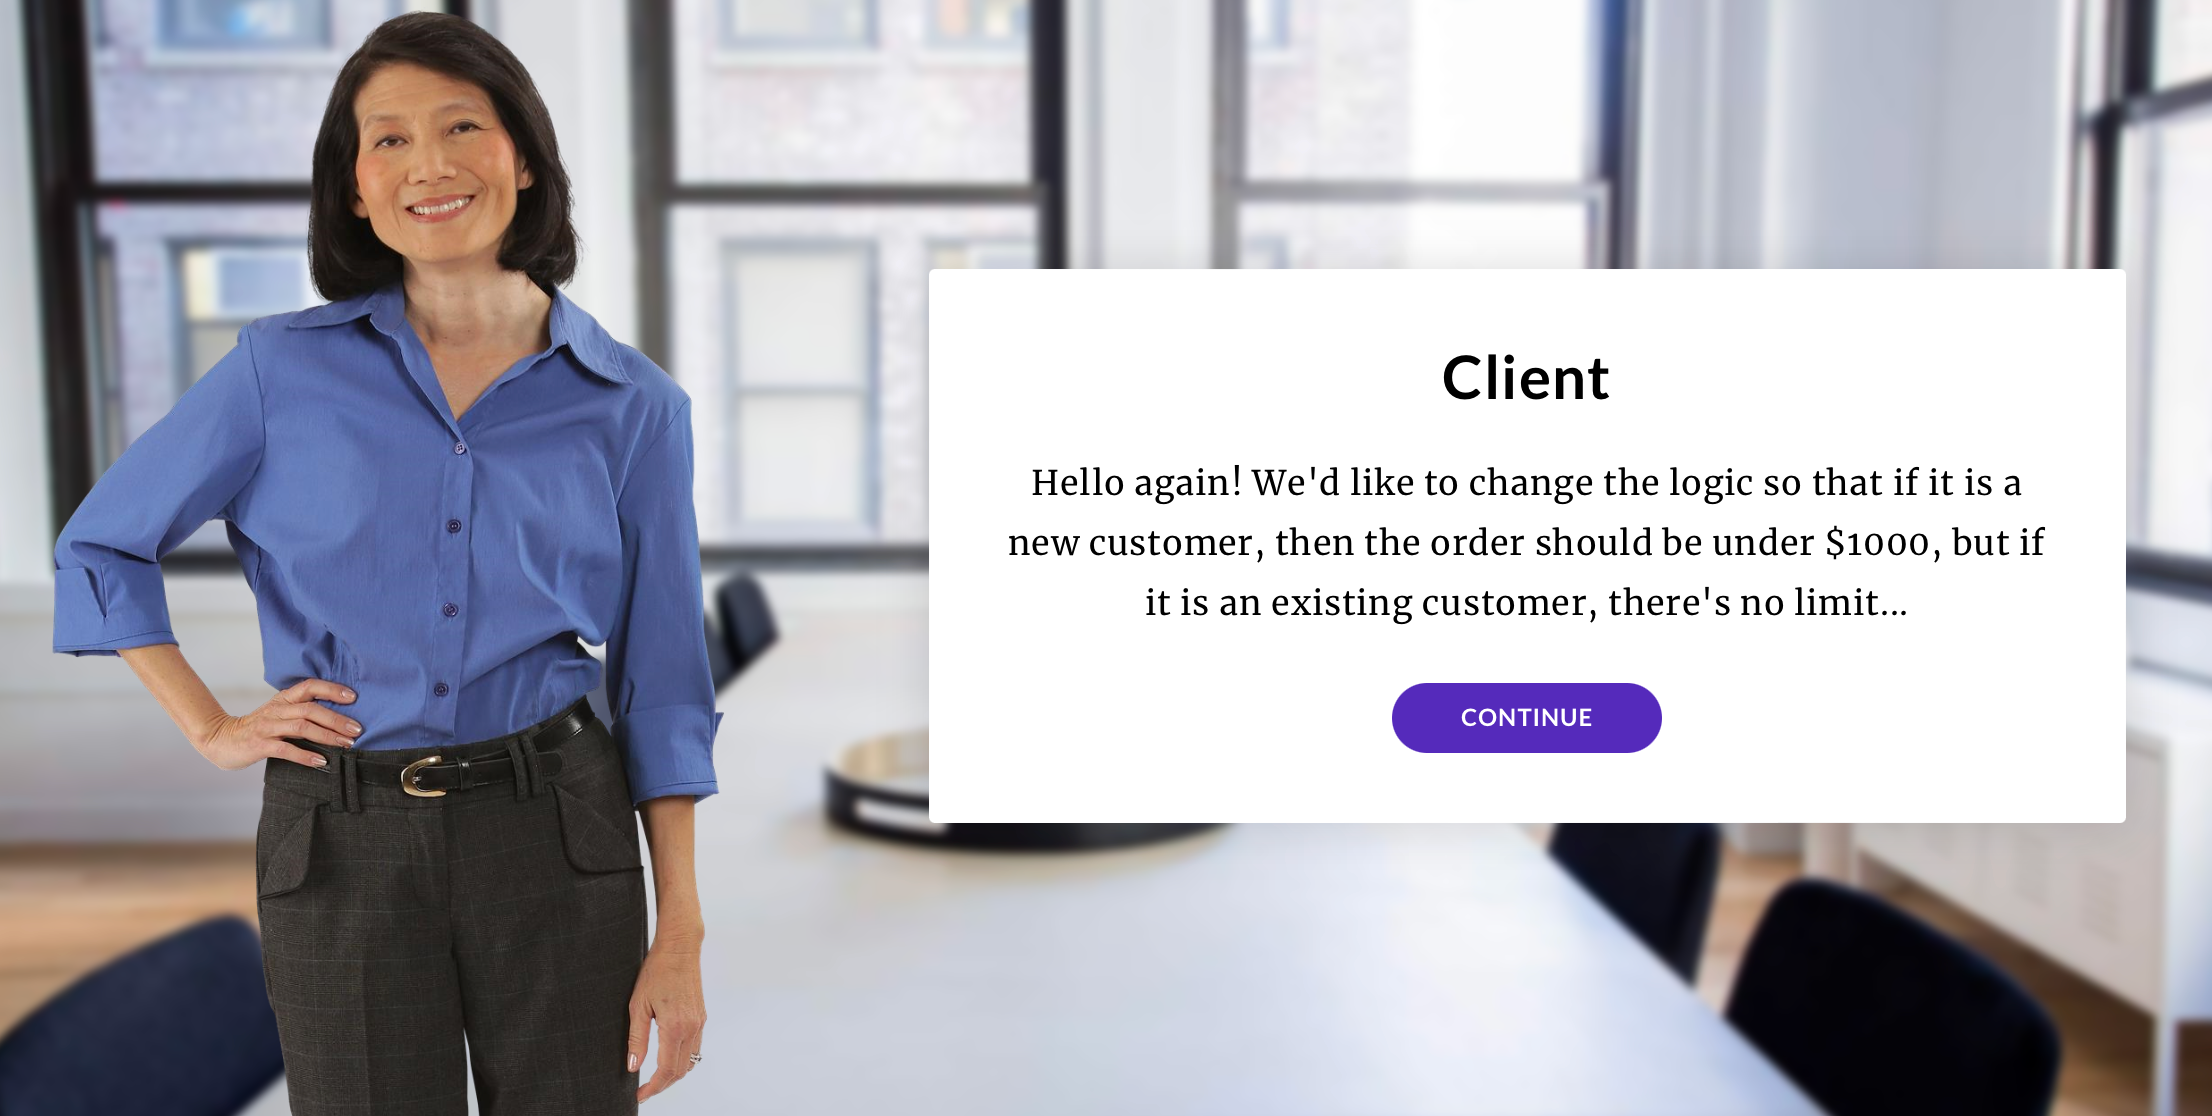
 So, if we go back and look at Scenario 1, we see that building all the requirements into a single Rule is an Anti-pattern, and will cost the client additional time and money to resolve.
 Whereas in the second scenario, because the partner built the Business Logic into the workflow, and not the rule, it was easier for them to update the requirements, without having to charge their clients for additional time spent fixing these changes.
 Key takeaways from this scenario
Here's what the partner creates... They take all three of the client's requirements and build it into a single Rule.3 months later the client comes back with a request to update one of their requirements.Now, let's look at the same scenario, but with a different Partner who follows the Best Practice advice and keeps logical gates isolated to their own Ruleset.Here's what the partner creates... They take the client's requirements and build a separate Rule for each of them.3 months later the client comes back with a request to update one of their requirements.So, if we go back and look at Scenario 1, we see that building all the requirements into a single Rule is an Anti-pattern, and will cost the client additional time and money to resolve.Whereas in the second scenario, because the partner built the Business Logic into the workflow, and not the rule, it was easier for them to update the requirements, without having to charge their clients for additional time spent fixing these changes.Key takeaways from this scenario- Smaller more granular rules are more composable and reusable, resulting in more configuration based flexibility and adaptability, which ultimately enables our clients with agility when requirements or market conditions change.
- Composing logic in the workflow (rather than code), allows clients and partners more control over their business processes, and reduces expensive and time consuming change requests to development teams
- Lifting business logic into the workflow also makes the logic and process detail more transparent, and not locked into a “black box” in code. Granularity in the workflow also results in richer audit events, which make triage and problem identification more efficient, and faster resolution times when issues are faced in the process.
Module 4. Event execution
Event execution
In this module, you'll learn about how events are executed on the Fluent platform. Let's begin by recalling some important concepts.Click on each tab below to refresh your knowledge of workflow, statuses and rulesets:A Workflow represents the journey of a Root entity and any related Sub-entity through various stages in its lifecycle, from initiation to its completion. The stages through which the entities move within the workflow are represented through States.Rulesets are a collection of one or more Rules which are combined to form a single task within a process. Movement from one state to another state is dependent on business logic, represented as a Ruleset within the workflow.
Orchestrateable entities and contexts
A workflow in the workflow framework is named by its Root Entity (1) and includes the lifecycles of its Sub-Entities (2):| Root Entities (1) | Sub-Entities (2) | Event Reference (3) | Platform CREATE Event? (4) |
| Location | Location Wave | LOCATION WAVE | ❌ ✅ |
| Order | Order Fulfilment Article Consignment | ORDER FULFILMENT ARTICLE CONSIGNMENT | ✅ ✅ ✅ ✅ |
| Fulfilment Options | Fulfilment Options Fulfilment Plan | FULFILMENT_OPTIONS FULFILMENT_PLAN | ✅ ✅ |
| Product Catalogue | Product Catalogue Standard Product Variant Product Group Product Category | PRODUCT_CATALOGUE PRODUCT PRODUCT PRODUCT CATEGORY | ✅ ✅ ✅ ✅ ✅ |
| Inventory Catalogue | Inventory Catalogue Inventory Position Inventory Quantity | INVENTORY_CATALOGUE INVENTORY_POSITION INVENTORY_QUANTITY | ✅ ✅ ✅ |
| Virtual Catalogue | Virtual Catalogue Virtual Position | VIRTUAL_CATALOGUE VIRTUAL_POSITION | ❌ ❌ |
| Control Group | Control Group Control | CONTROL_GROUP CONTROL | ❌ ❌ |
| Return Order | Return Order Return Fulfilment | RETURN_ORDER RETURN_FULFILMENT | ✅ ✅ |
| Billing Account | Billing Account Credit Memo Invoice Payment Payment Transaction | BILLING_ACCOUNT CREDIT_MEMO INVOICE PAYMENT PAYMENT_TRANSACTION | ✅ ✅ ✅ ✅ ✅ |
Example of root and sub-entities:
- Product Catalogue workflow contains the lifecycles for the Product Catalogue root entity, products and categories.
- Order Workflow contains the lifecycles and for Order, Fulfilment, Consignment and Article.
Example of a Sample Event
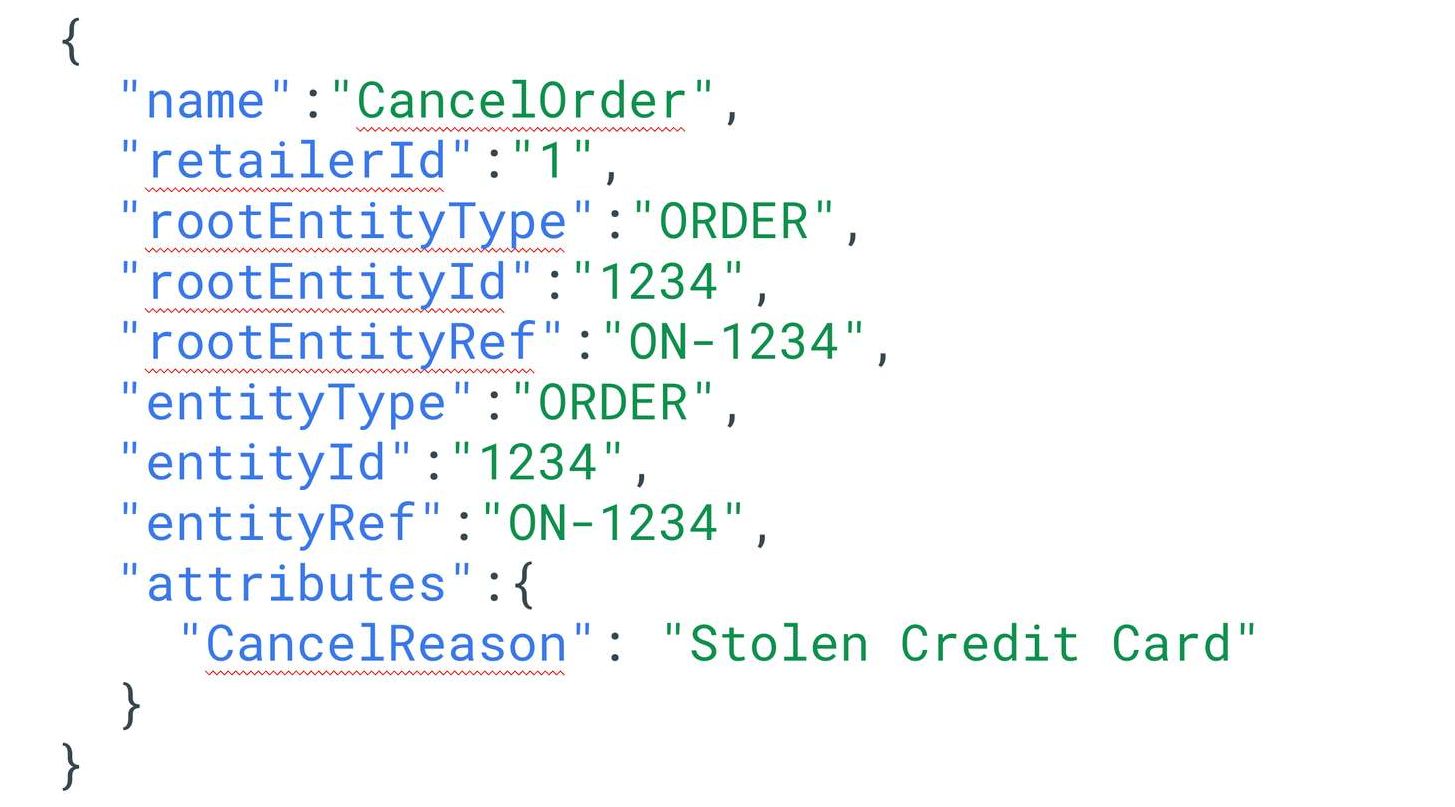
A JSON structure of a sample event is shown below and contains a number of attributes — this is the format of the Event API.Entity type “entityType” is Order, but it could also be Fulfilment, Articles or Consignment.Event “name” is CancelOrder. It’s quite clear that it corresponds with the matching ruleset and encapsulates all of the business logic required to cancel an order.What happens when an orchestration event is received?
When an orchestration event is received, the Workflow Engine loads the workflow associated with the entity defined in the event context. Next, it searches for a ruleset using the primary Ruleset matching criteria, as follows:- Event Name = Ruleset Name
- Entity Type - e.g: Type = ORDER
- Entity Subtype - e.g: Order.type = HD
- Entity Status - e.g: Order.status = BOOKED